What you'll learn
Before you start
- The invitation email (from an employer referral or admin invite)
- Your company details (name, FEIN, address, contact info)
- A sample payroll file for one of your clients (CSV, XLS, or XLSX)
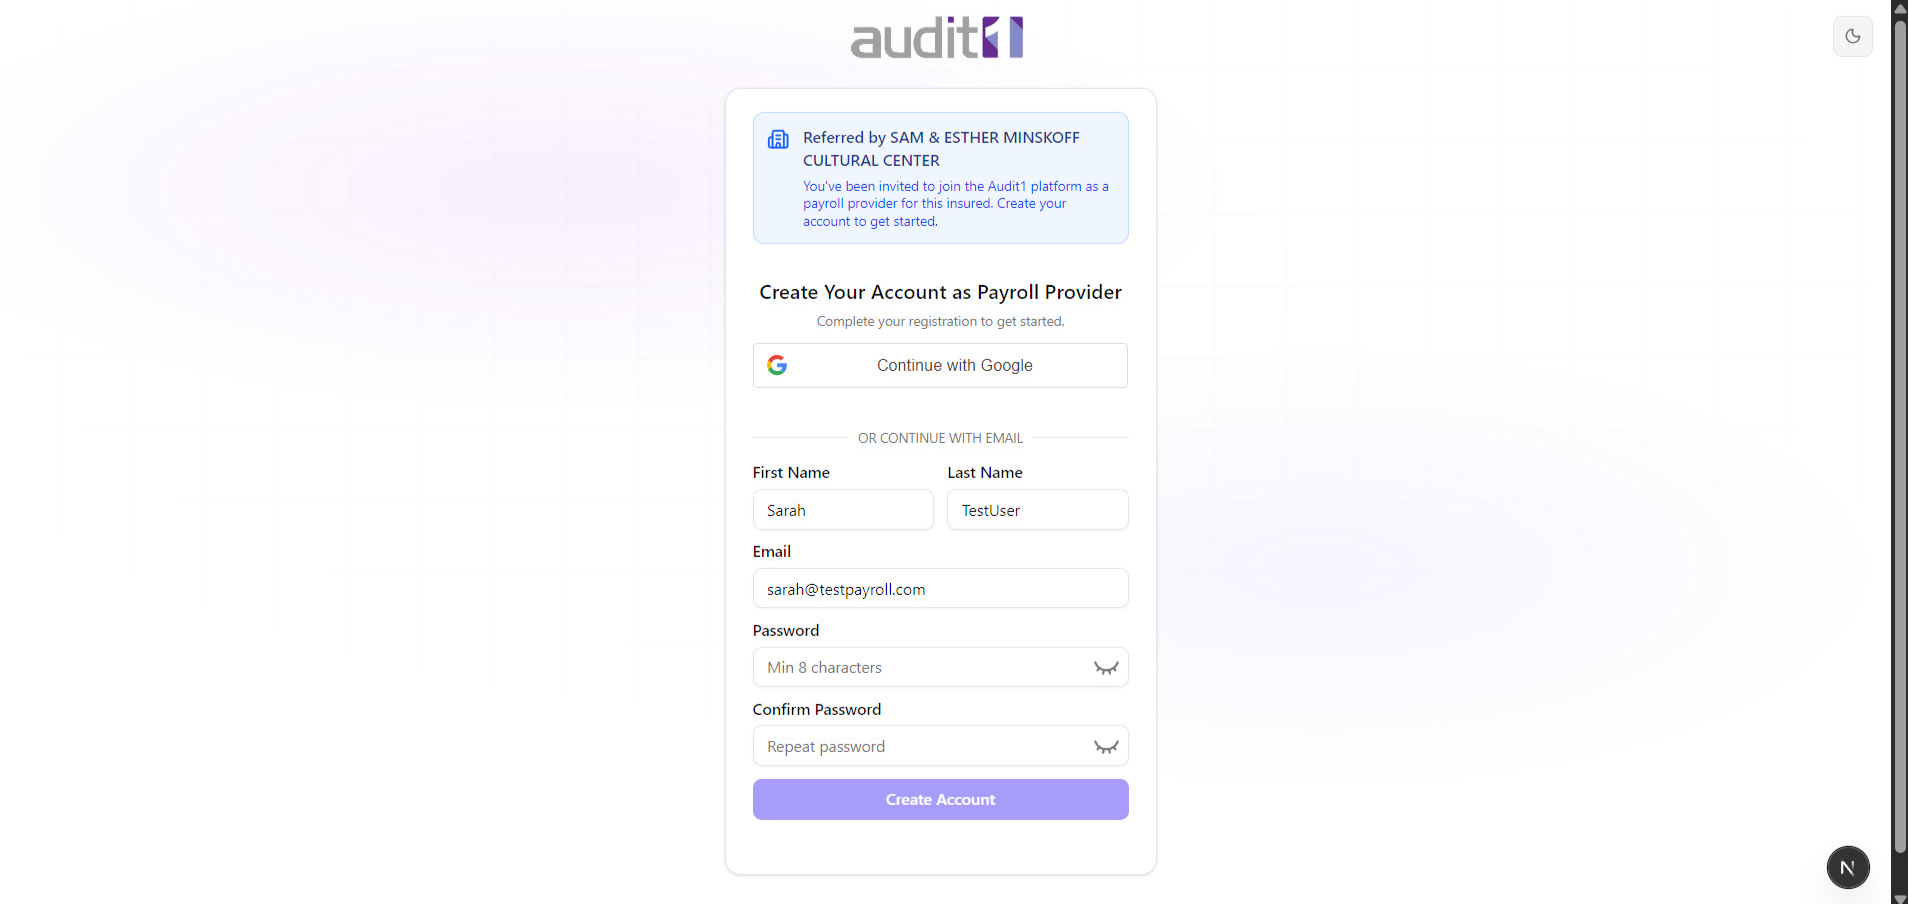
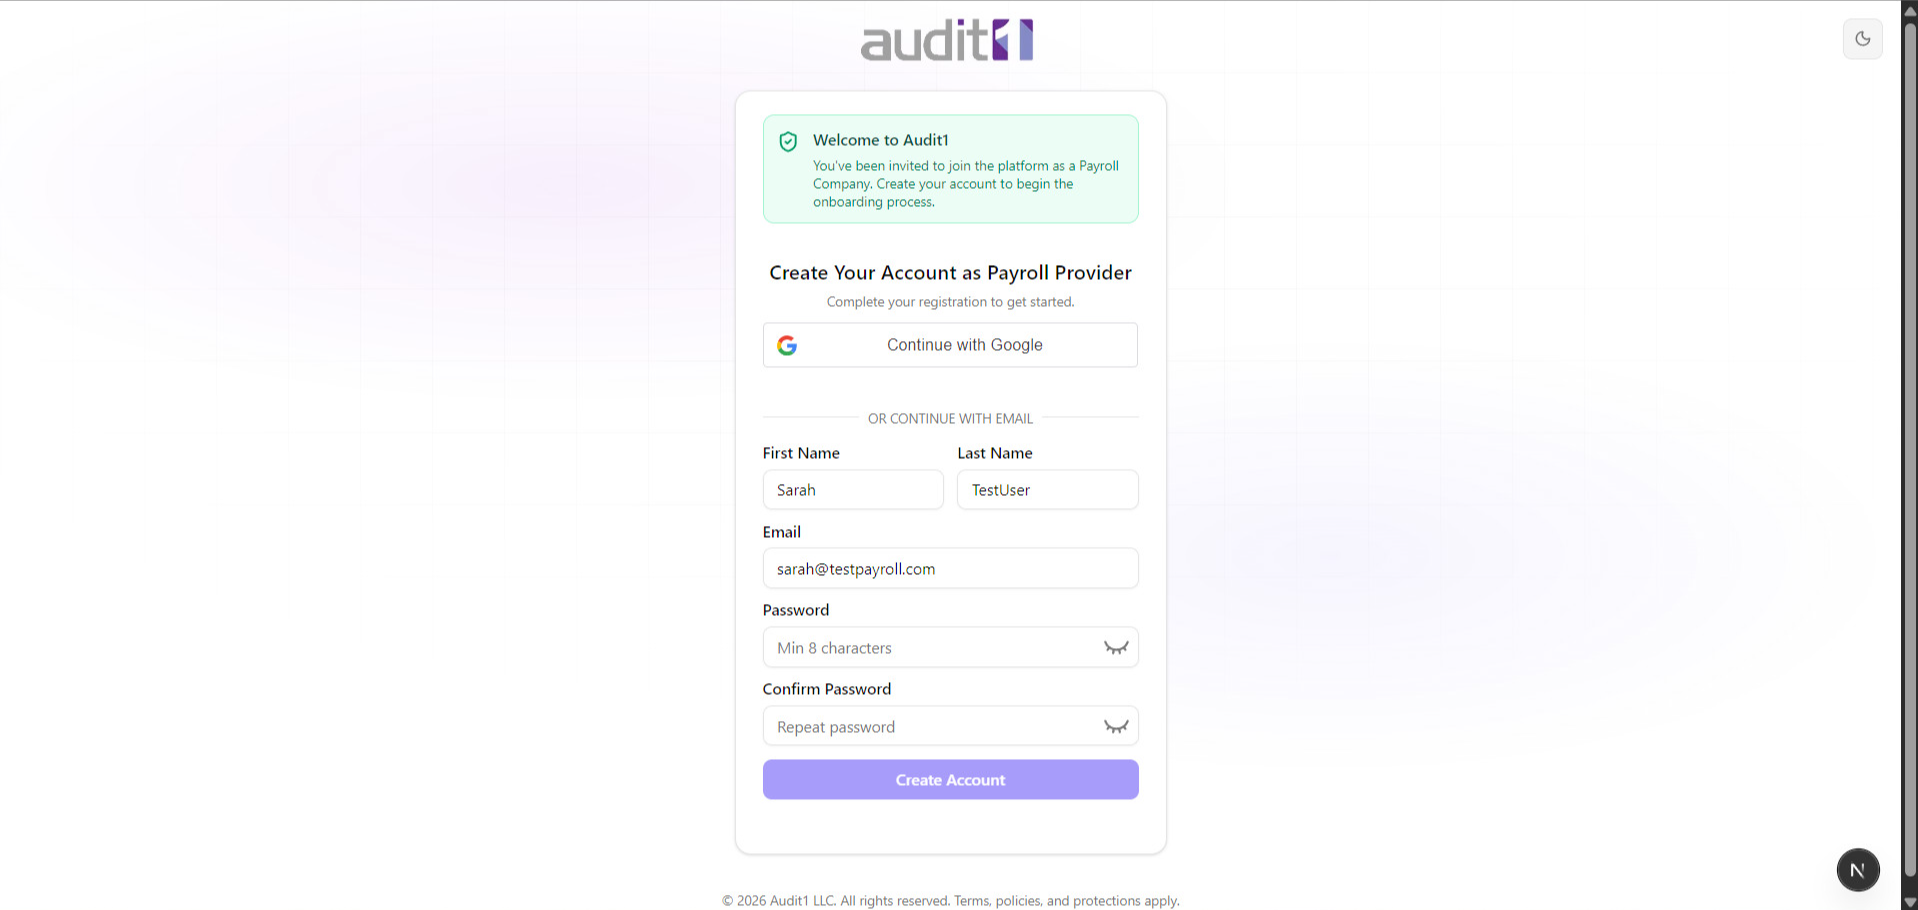
Open the Invitation Email
You'll receive one of two types of invitations.
Employer Referral
One of your clients referred you. The email says something like: "Referred by [Company Name] — You've been invited to join the Audit1 platform as a payroll provider."
Direct Admin Invite
An Audit1 admin invited you directly. The email says: "Welcome to Audit1 — You've been invited to join the platform as a Payroll Company."
Click the link in the email to get started.
Create Your Account
Register with Google or email — same as the employer flow.
Fill in your first name, last name, email (may be pre-filled), and create a password (8+ characters). Or click Sign in with Google for a faster setup.
Click "Create Account" to continue.
Confirm Your Company Profile
Step 1 of 7 — verify your company details.
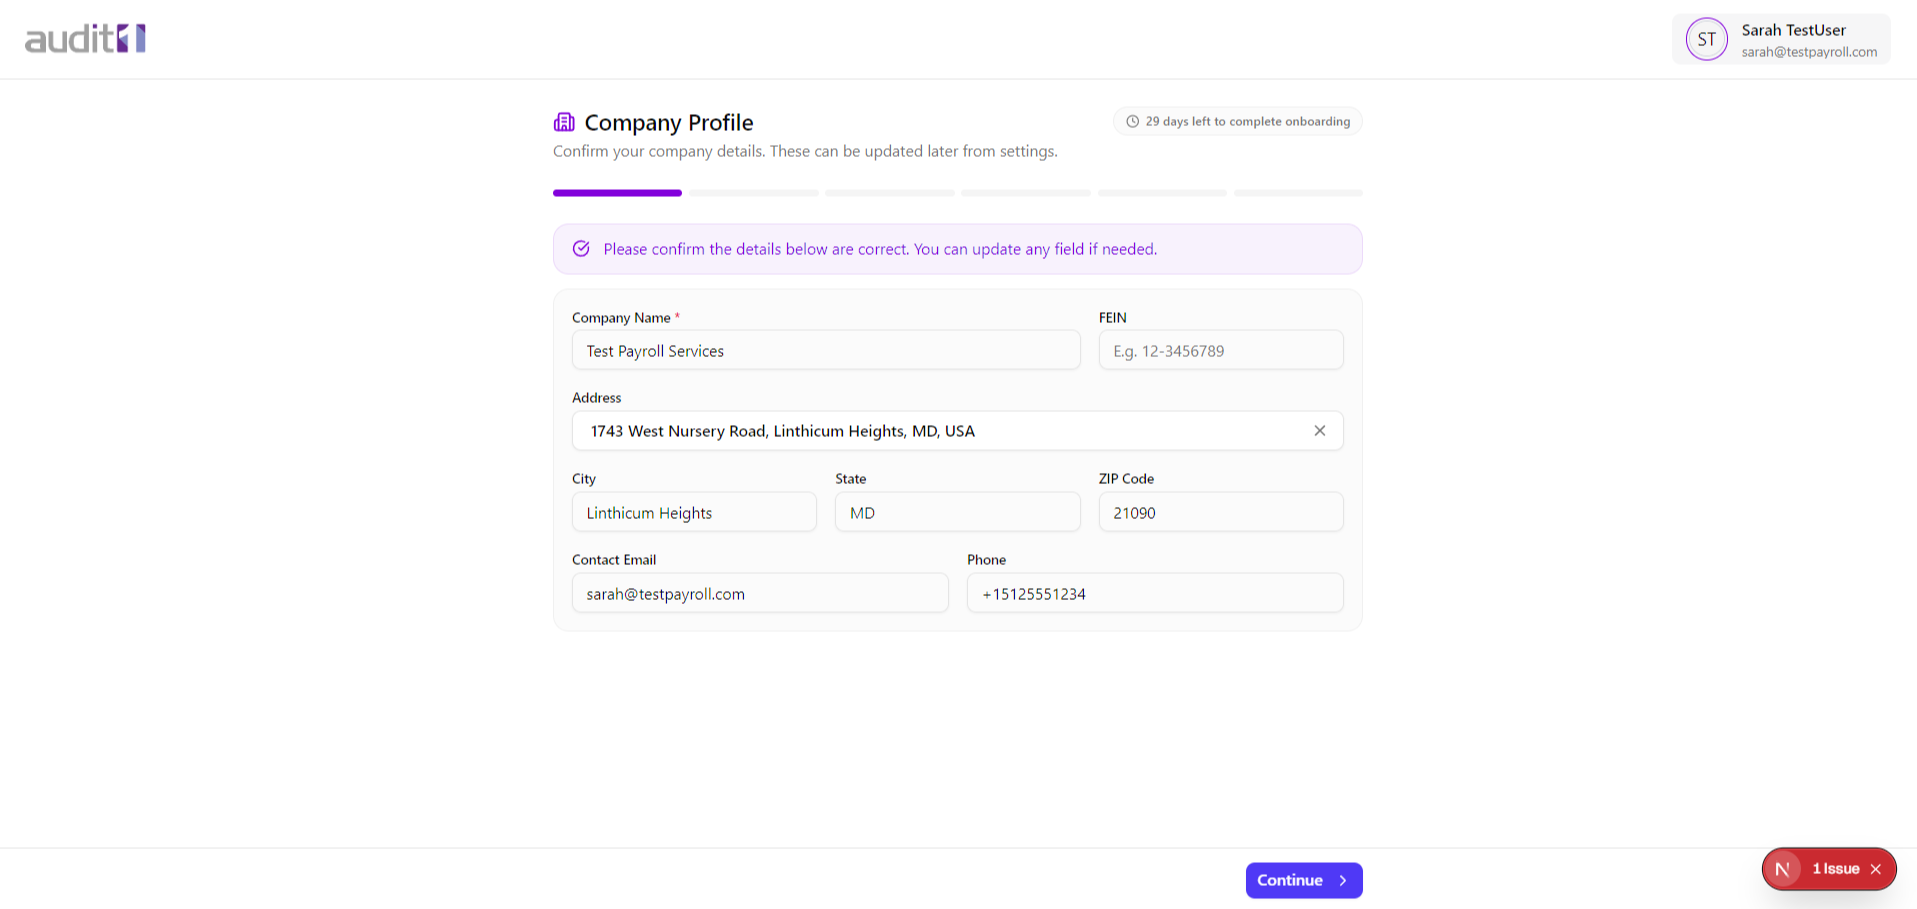
Most fields may be pre-filled. Correct anything that's wrong. Only the Company Name is required to proceed.
Click Continue.
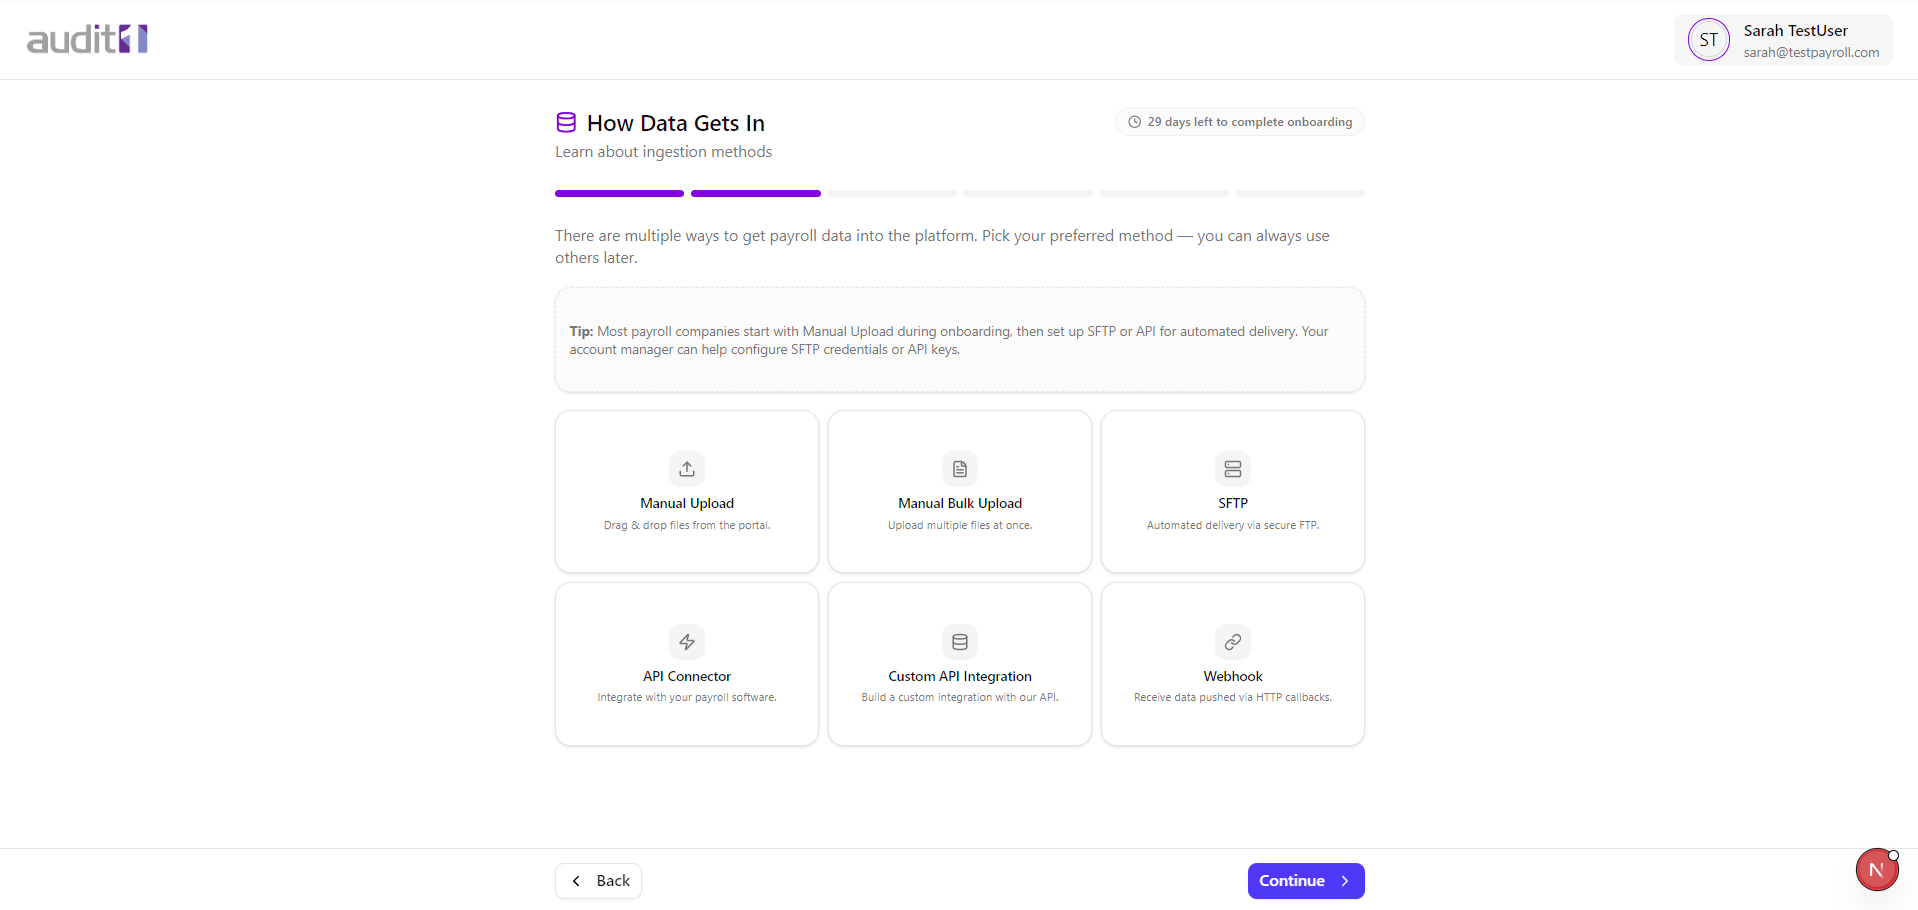
Learn How Data Gets In
Steps 2-5 — educational screens about the platform.
Data Ingestion Methods (Step 2)
The platform supports 6 ways to send payroll data. Select the methods you're interested in — you can always change later.
Processing Pipeline (Step 3)
Learn about the 4-stage processing pipeline that every payroll file goes through:

- Upload — files arrive via any method you chose
- Normalize — raw data is converted to a standard CSV format
- Validate — class codes and states are checked against the policy
- Calculate — auditable wages and premium are computed
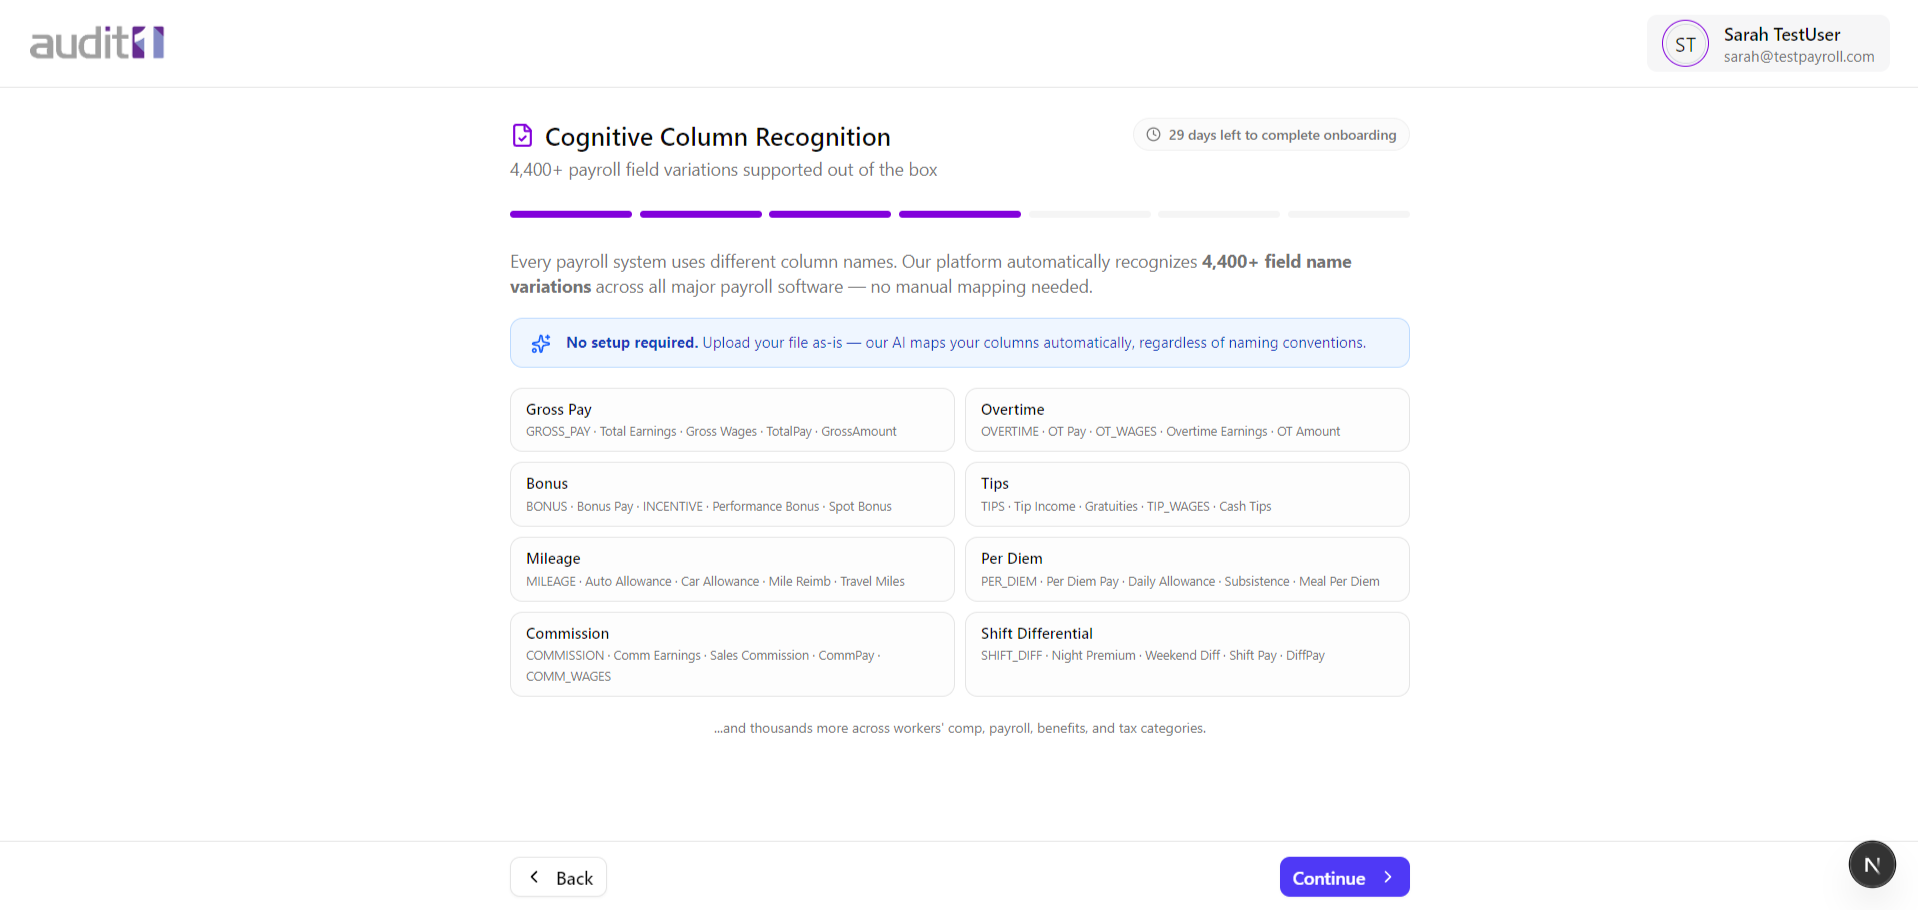
Column Recognition (Step 4)
The platform automatically recognizes 4,400+ payroll field name variations — no manual column mapping needed.
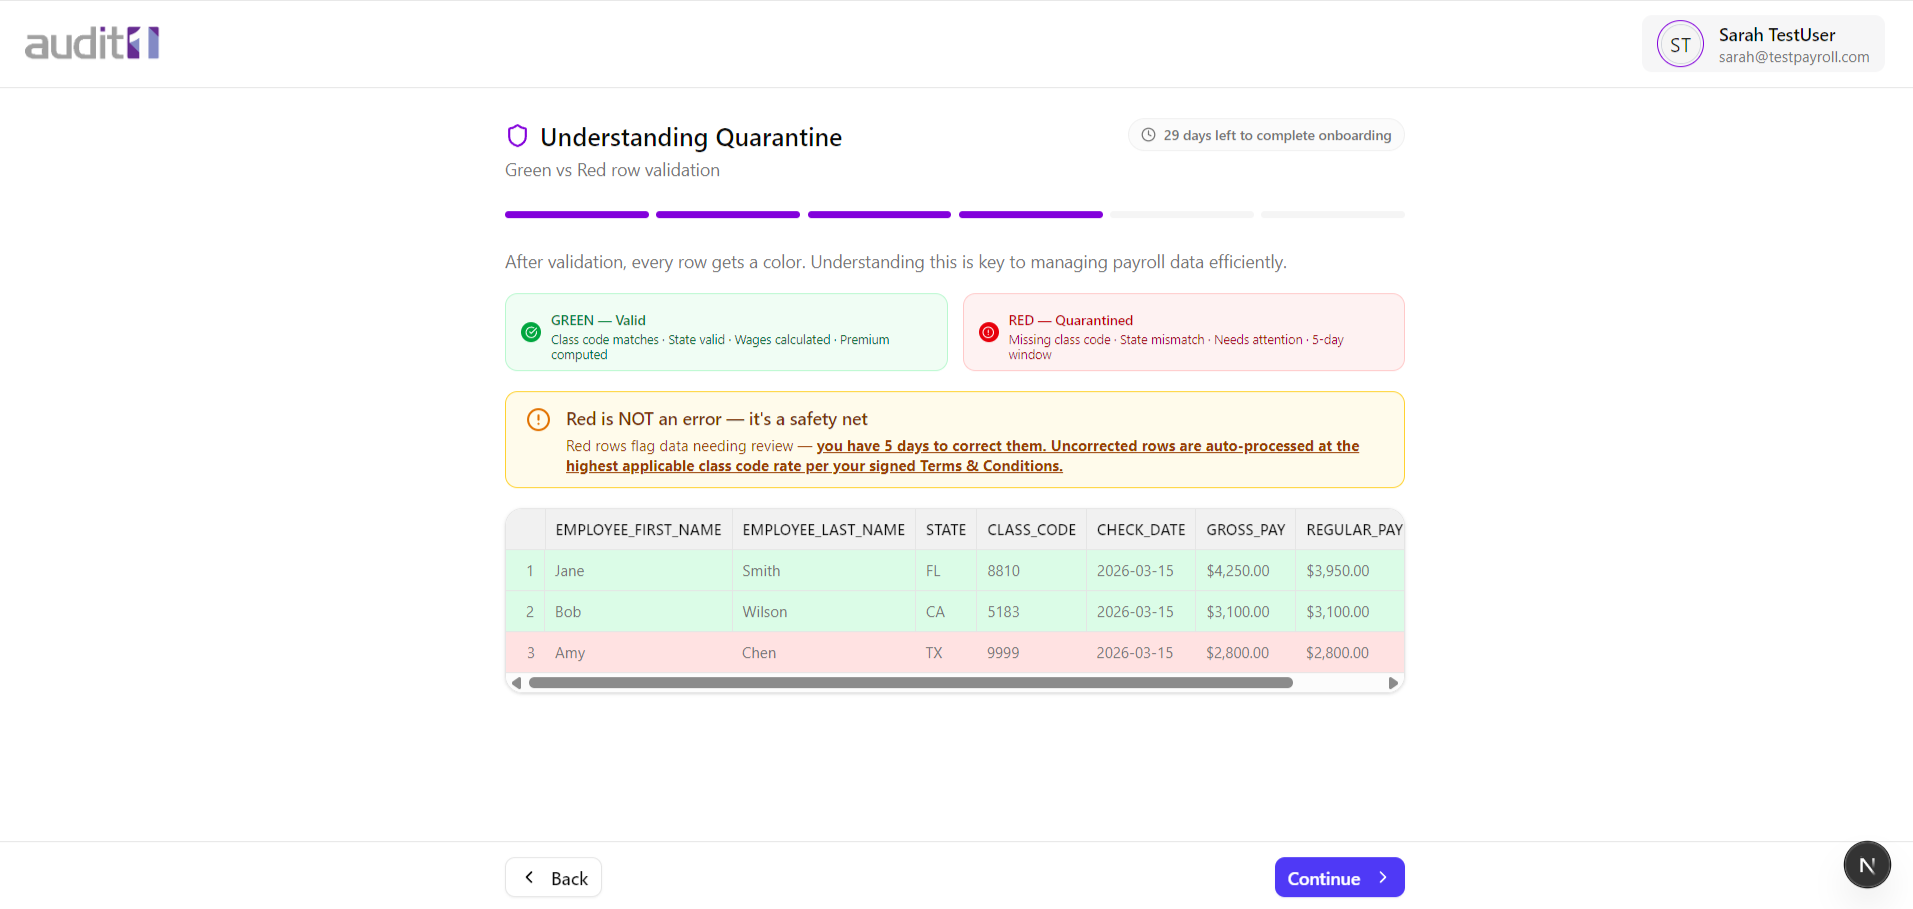
Quarantine System (Step 5)
Learn about row-level validation:
Click Continue through each educational step.
Review Your Clients
Step 6 — see the employers linked to your account.
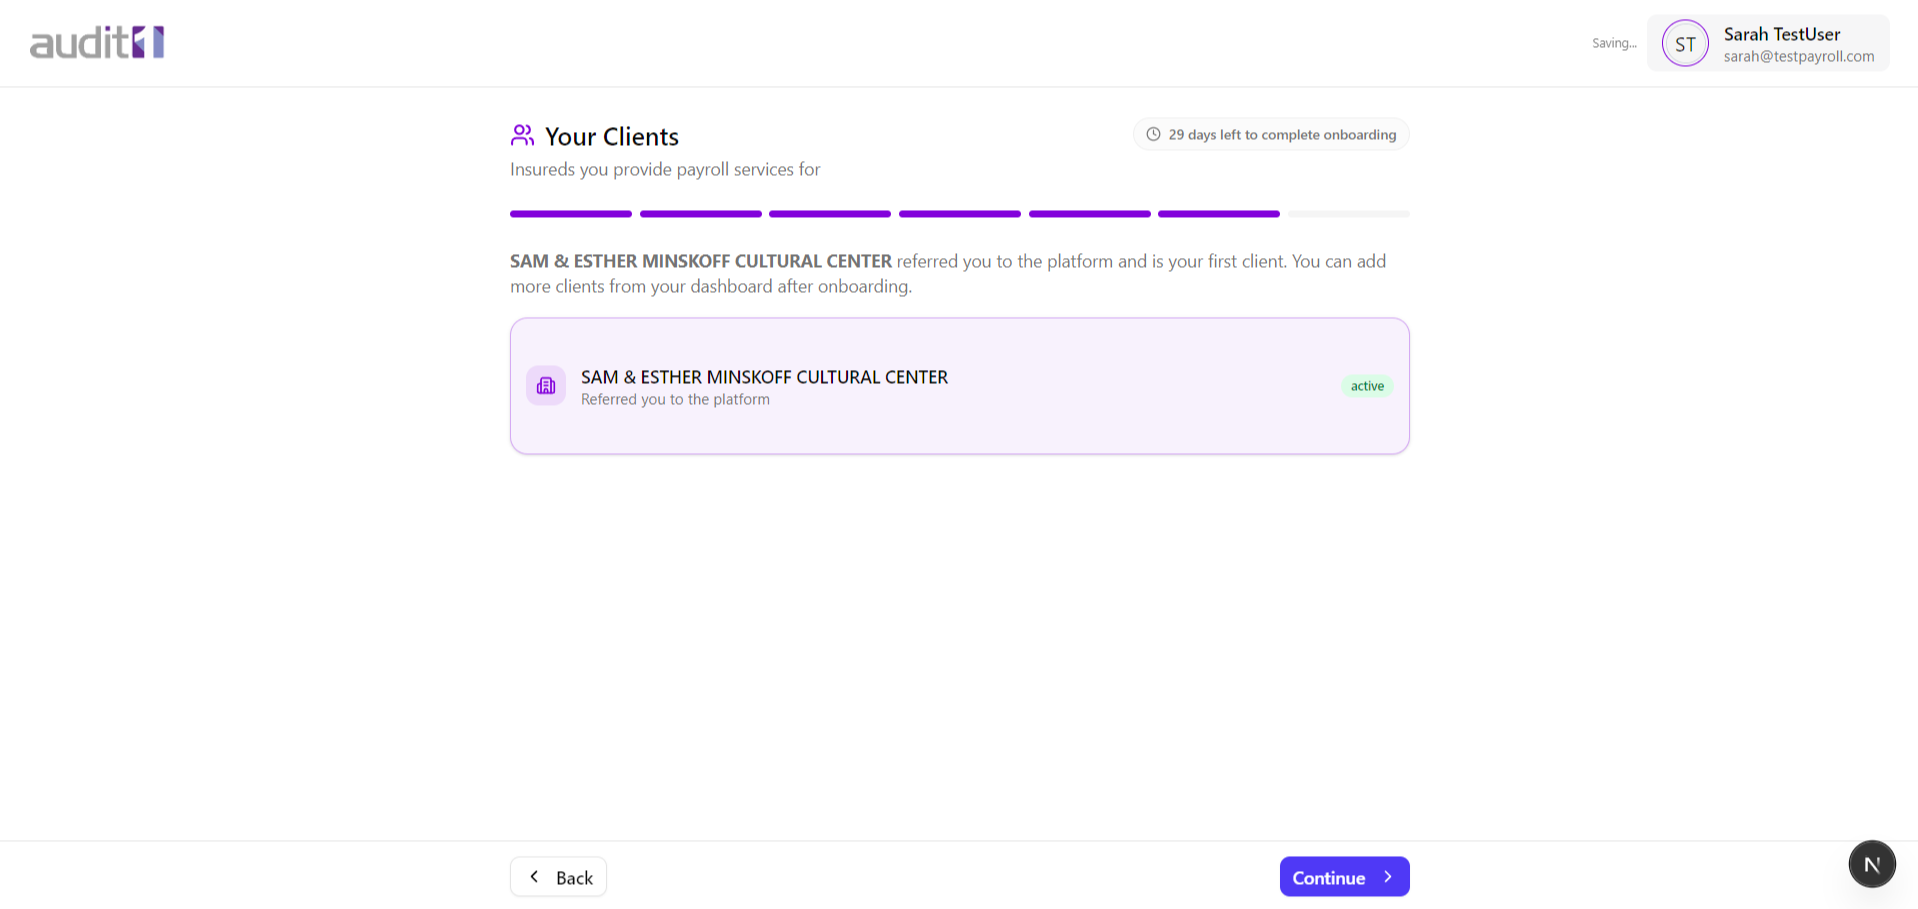
If you were referred by an employer, they'll appear here with an "active" badge. You can add more clients from your dashboard after onboarding.
Click Continue.
Upload a Proof of File
Step 7 — the final step. Upload a test payroll file to verify everything works.
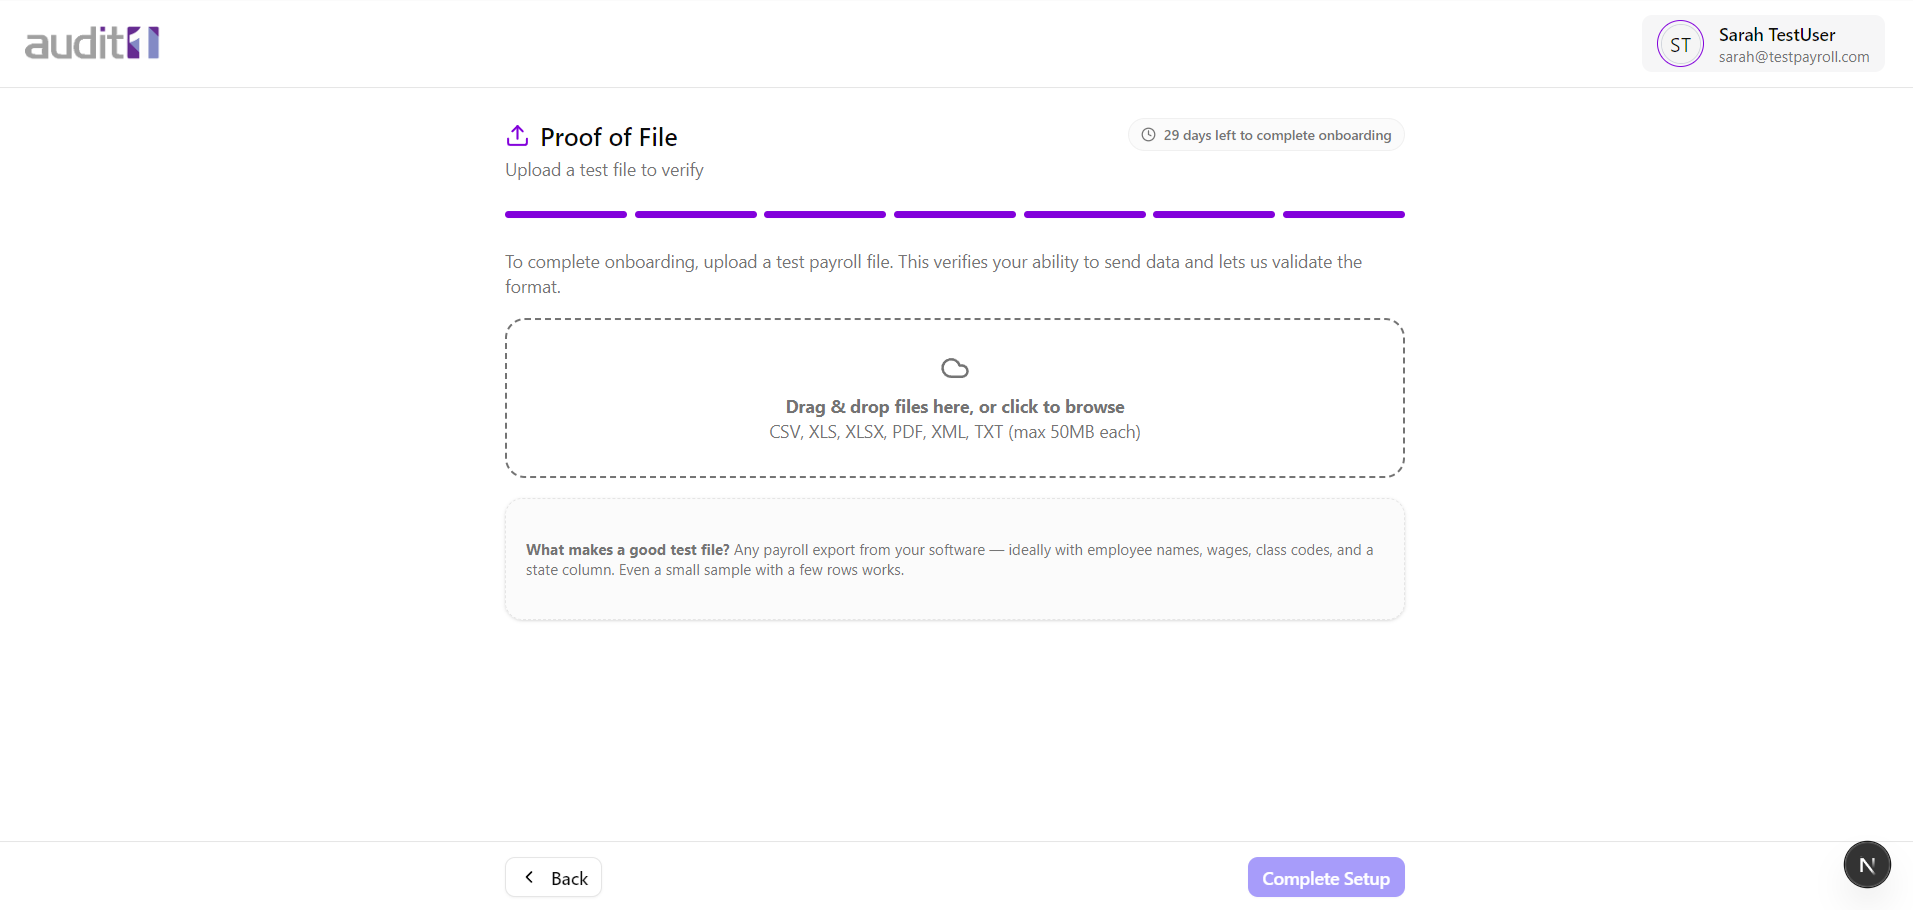
Upload a sample payroll file to prove you can send data. This is a dry run — no premiums are charged.
The system processes your file and shows the result. Even if it finds issues, the upload proves you can send data. Click "Complete Setup" to finish.