What you'll learn
Before you start
- The invitation email from your insurance carrier
- Your business details (company name, FEIN, address)
- A contact person's name and email
- Your payroll provider's name (if you use one)
- Bank account information for premium payments
Open the Invitation Email
Your carrier sends you an email when it's time to set up payroll reporting for your policy.
Look for an email with the subject "Workers' Comp Onboarding" from your carrier. It contains a branded card with your company name and policy details.

Click the "Complete Onboarding" button. This opens the employer portal.
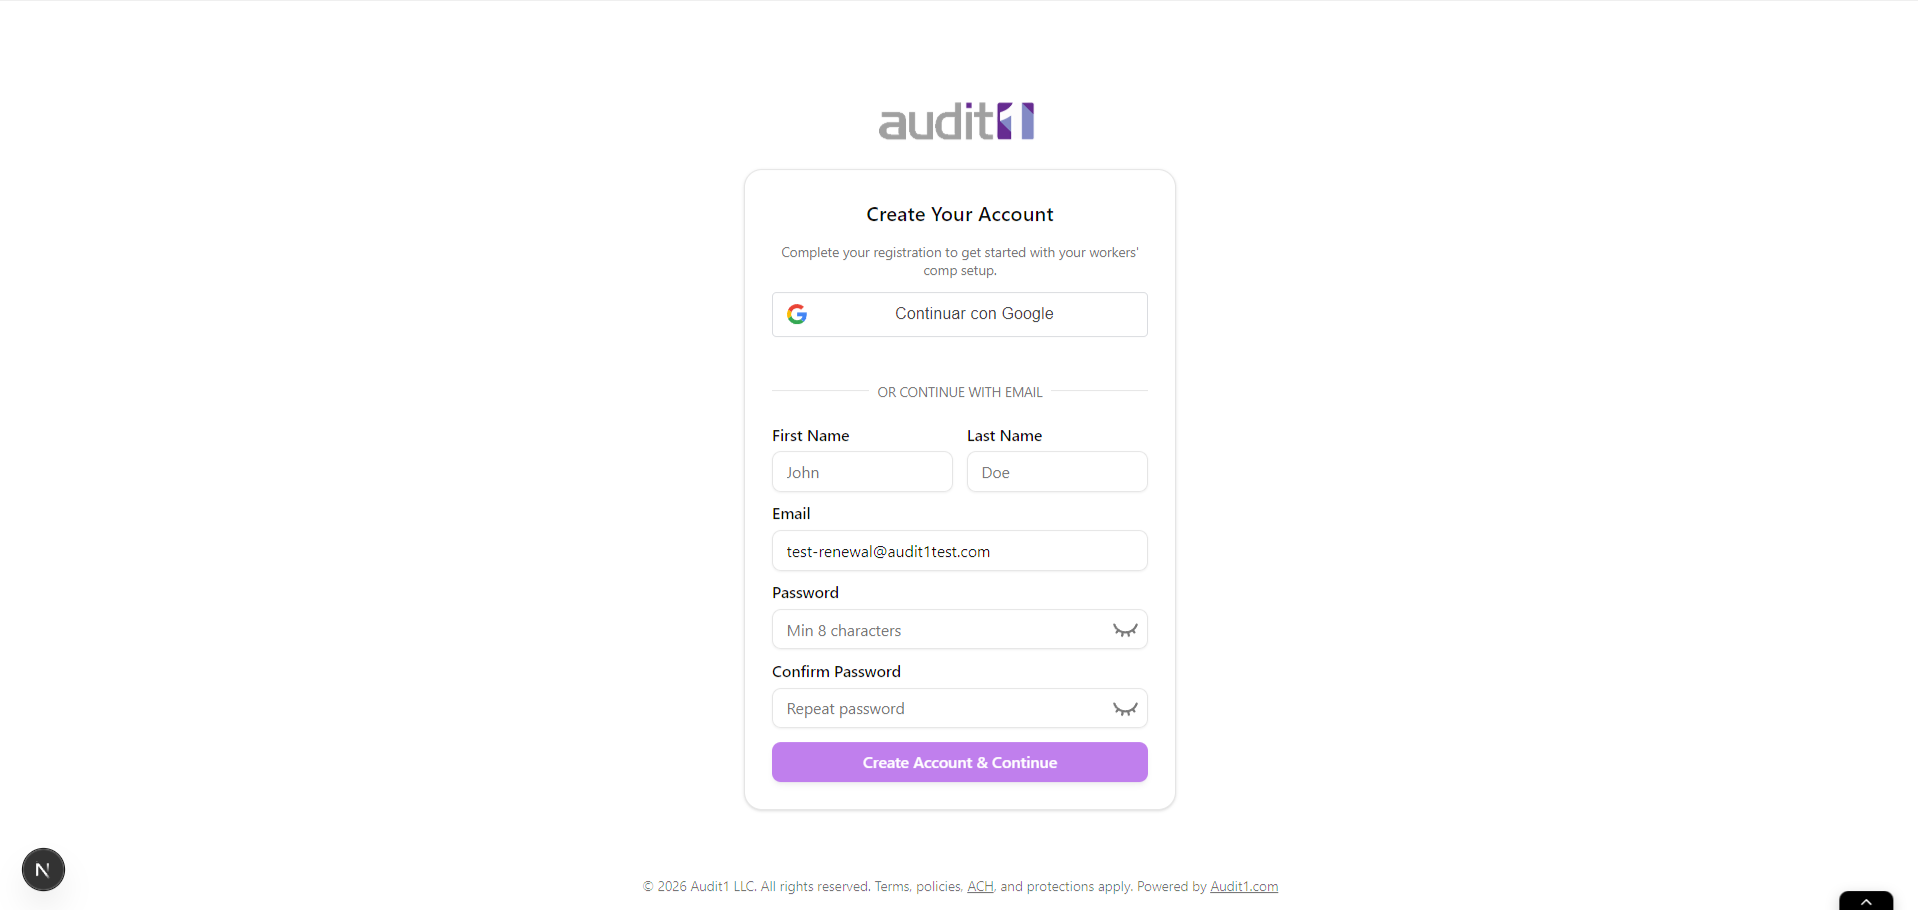
Create Your Account
Register a new account or sign in to an existing one.
If this is your first time, you'll see a registration page. You have two options:
- Sign in with Google — fastest option if you use a Google work email
- Create with email & password — fill in your name, email, and choose a password (8+ characters)
Confirm Company Details
Step 1 of the wizard — verify your business information.
After registration, the onboarding wizard starts. The first step shows your company information pre-filled from your policy. You'll see a countdown in the corner showing how many days you have left.
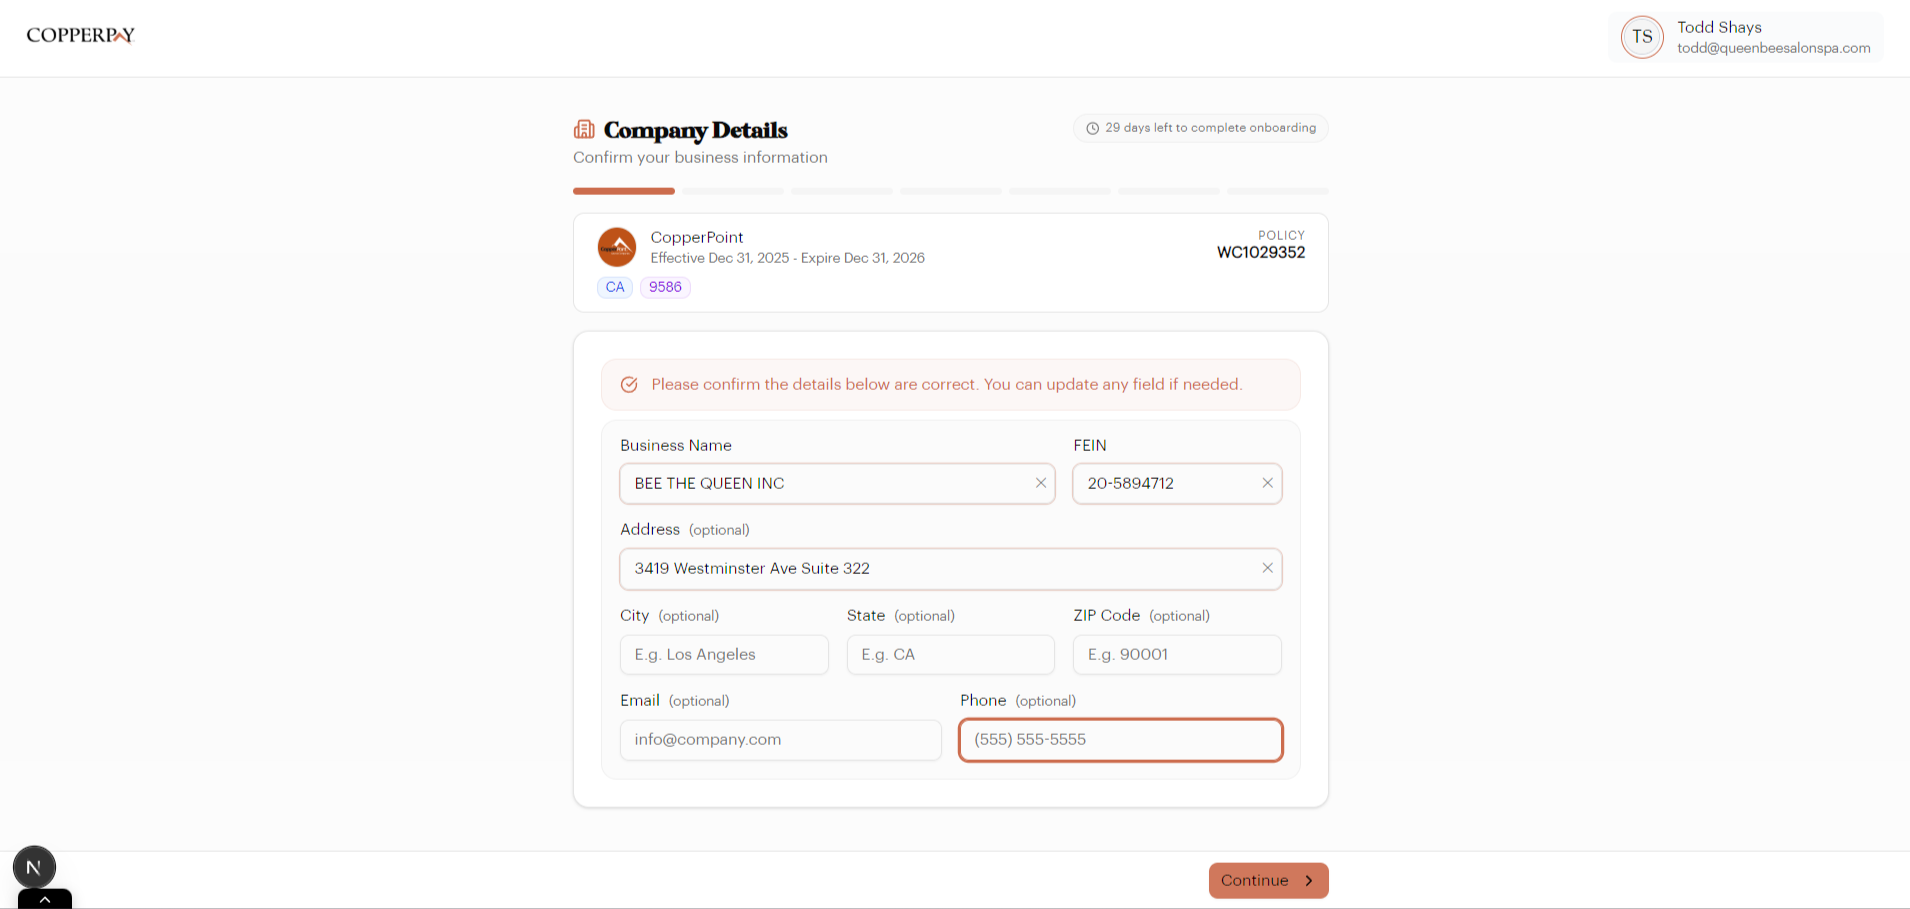
The fields include:
- Business Name (required)
- FEIN — your federal tax ID
- Address, City, State, ZIP
- Email and Phone (optional but recommended)
Review everything, correct anything that's wrong, and click Continue.
Add a Contact Person
Step 2 — who should the carrier reach out to?
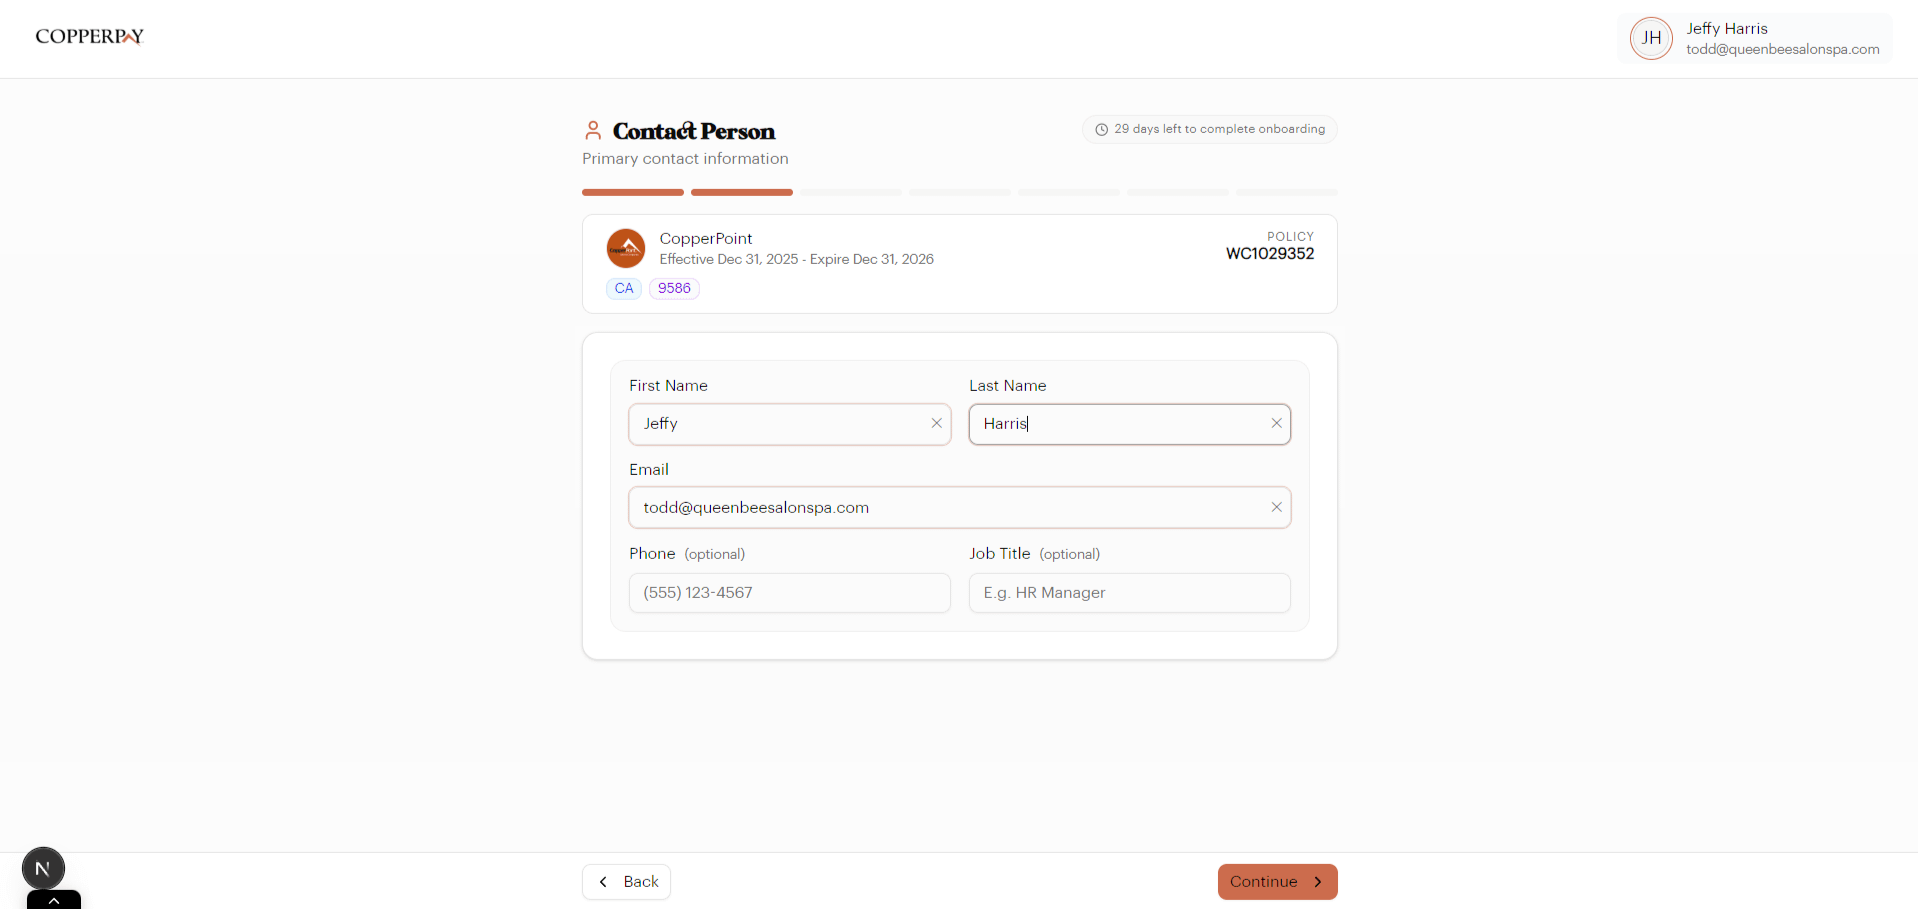
Enter the primary contact for your workers' comp account:
- First Name and Last Name (required)
- Email (required)
- Phone and Job Title (optional)
This is the person your carrier will reach out to for questions. Click Continue.
Set Up Payroll Reporting
Step 3 — the most important step. Choose how your payroll data gets reported.
You'll choose one of two reporting methods:
Option A: "I use a payroll company"
Select this if a third-party provider (ADP, Paychex, Gusto, etc.) handles your payroll. Pick your payroll company and software from the dropdowns, and choose your payroll frequency.
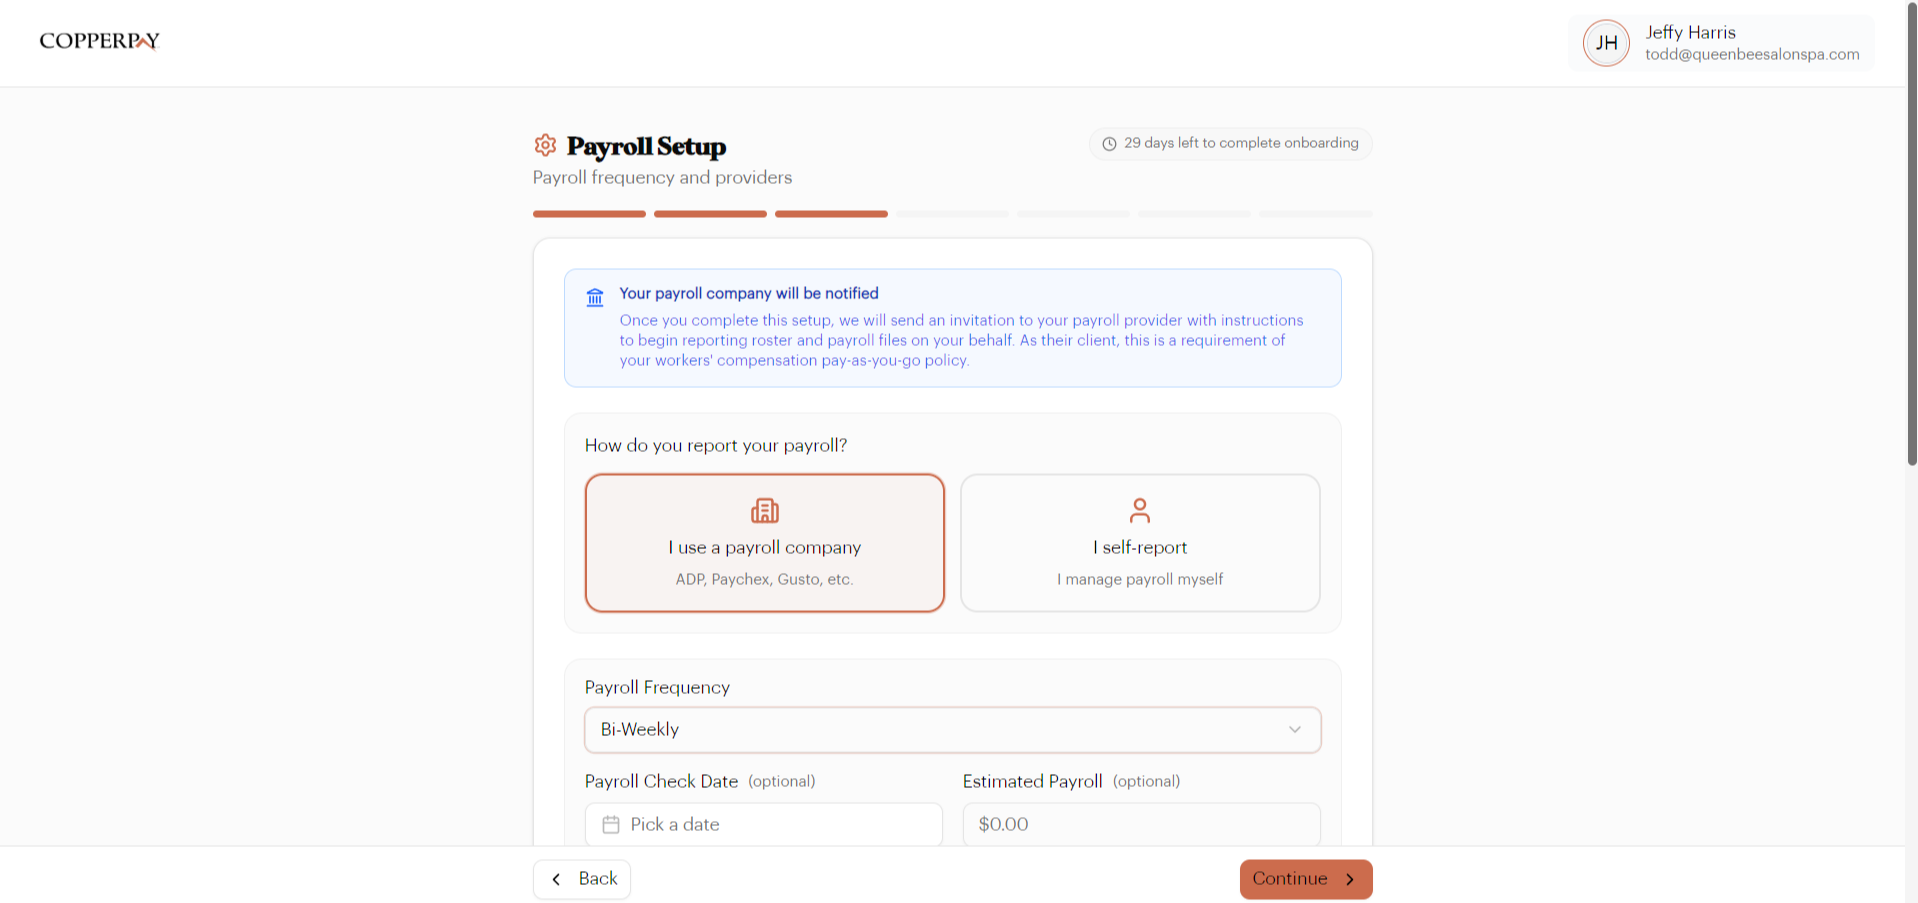
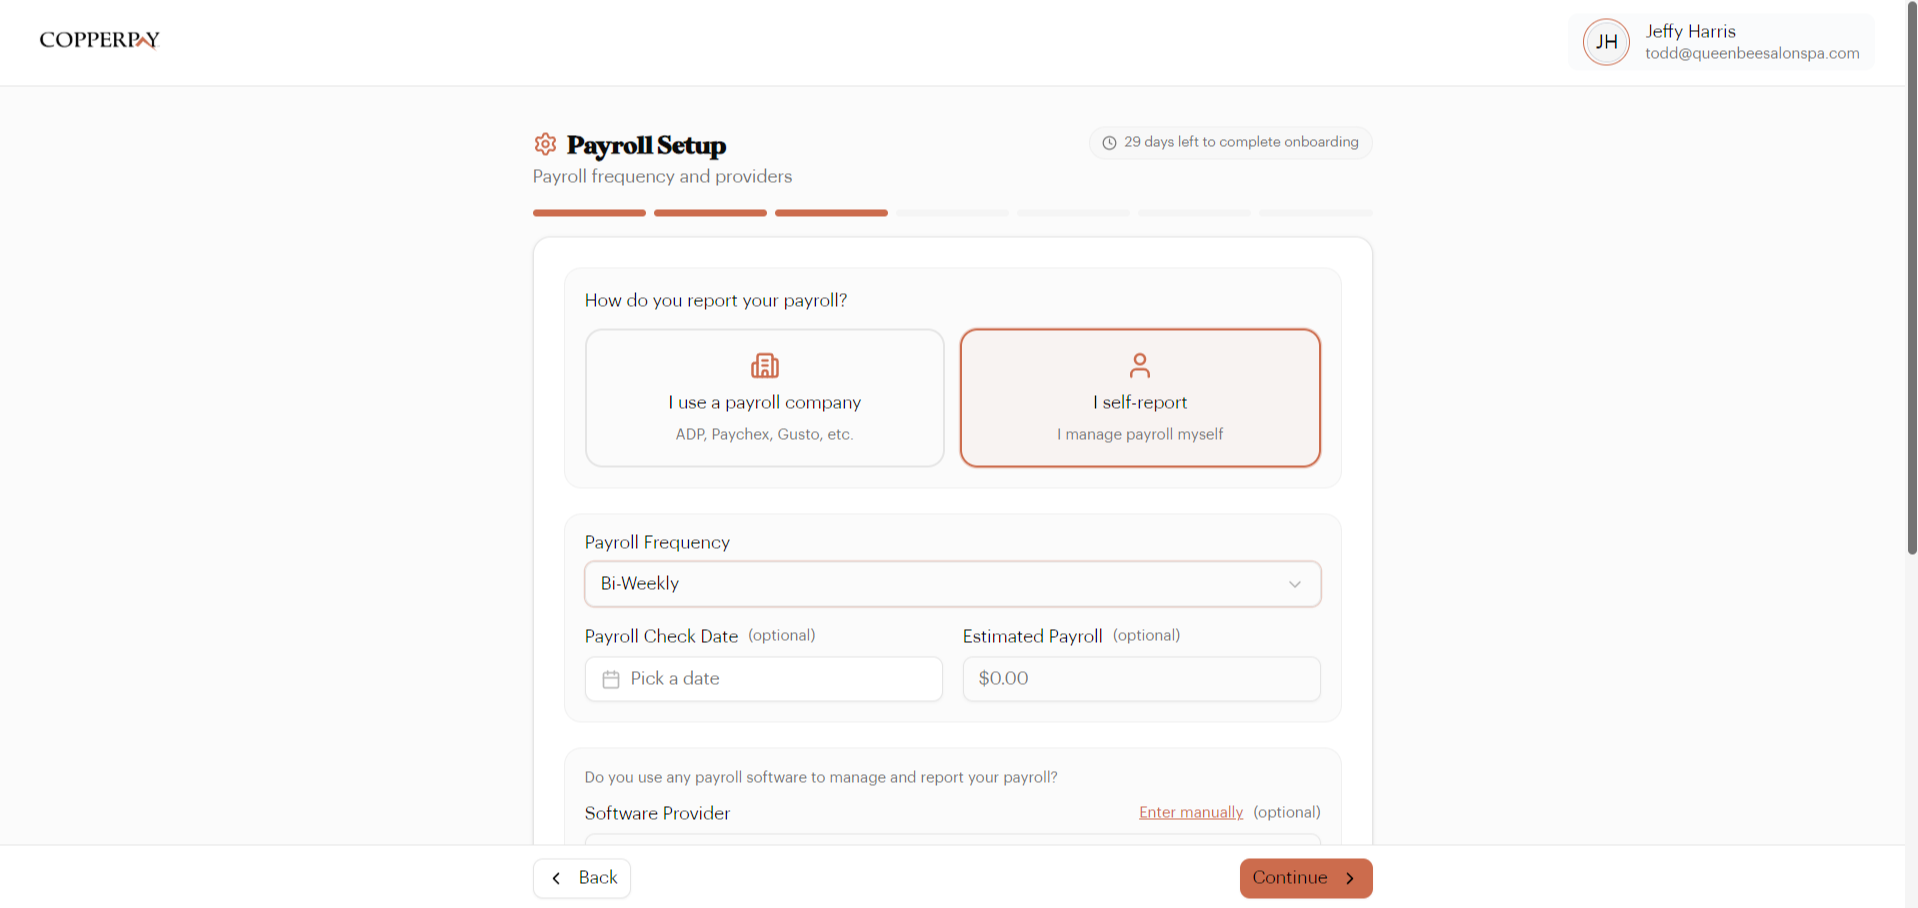
Option B: "I self-report"
Select this if you manage payroll yourself. Choose your payroll frequency and optionally select the software you use.
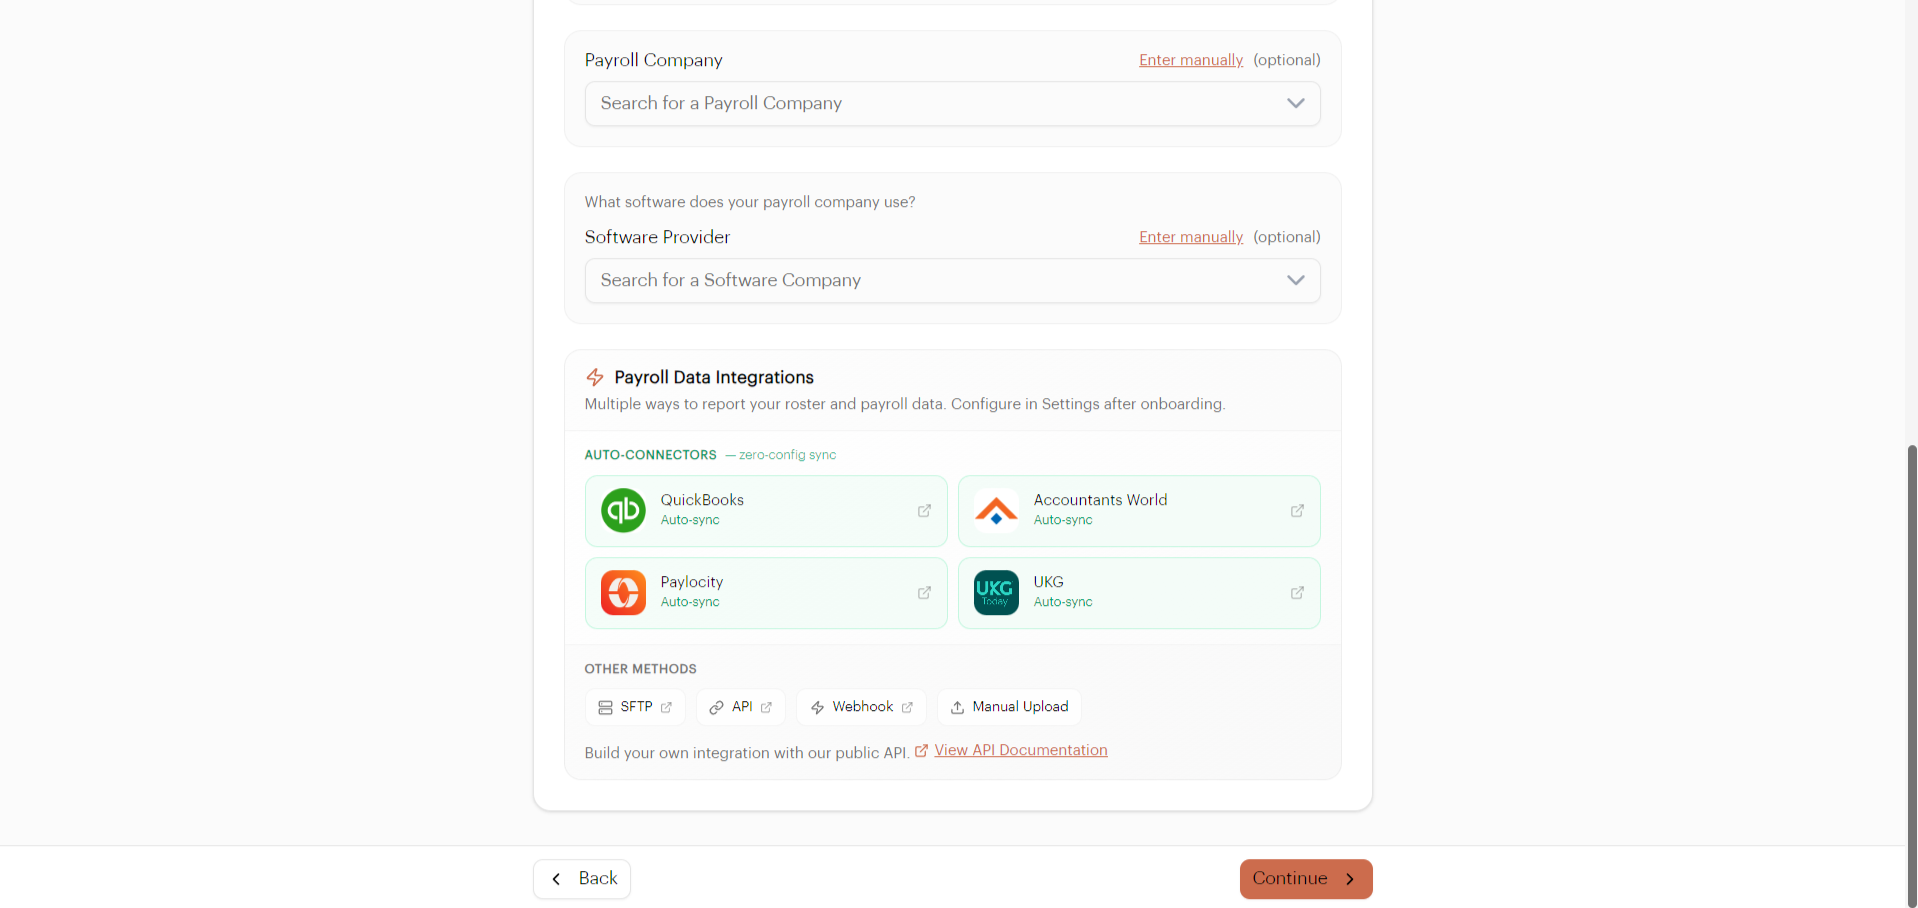
Payroll Data Integrations
Scroll down to see the available ways to get your data into the system. You can configure these later from Settings.
Click Continue.
Connect a Bank Account
Link the bank account for premium payment debits.
This is where your workers' comp premium payments will be debited via ACH. You have two options:
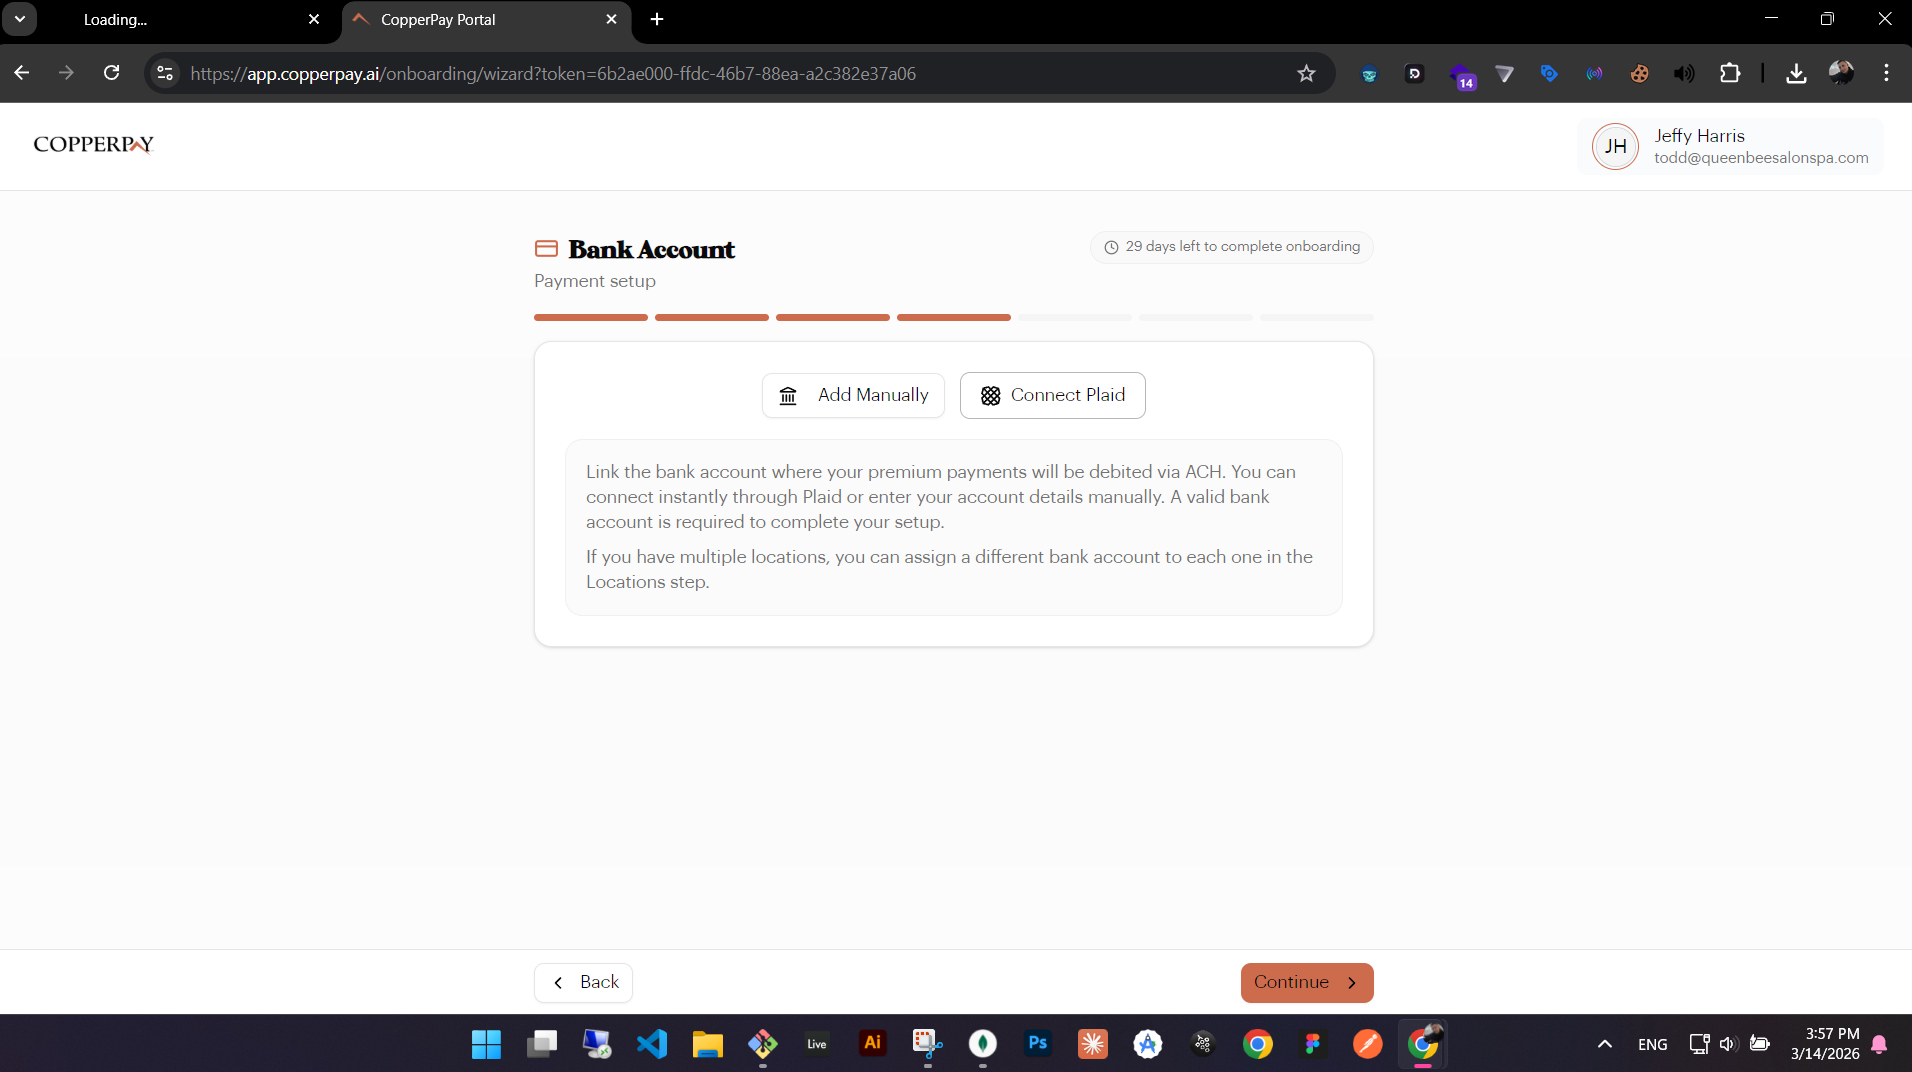
- Connect with Plaid — instant, secure connection to your bank (recommended)
- Add Manually — enter bank name, account type, account number, and routing number
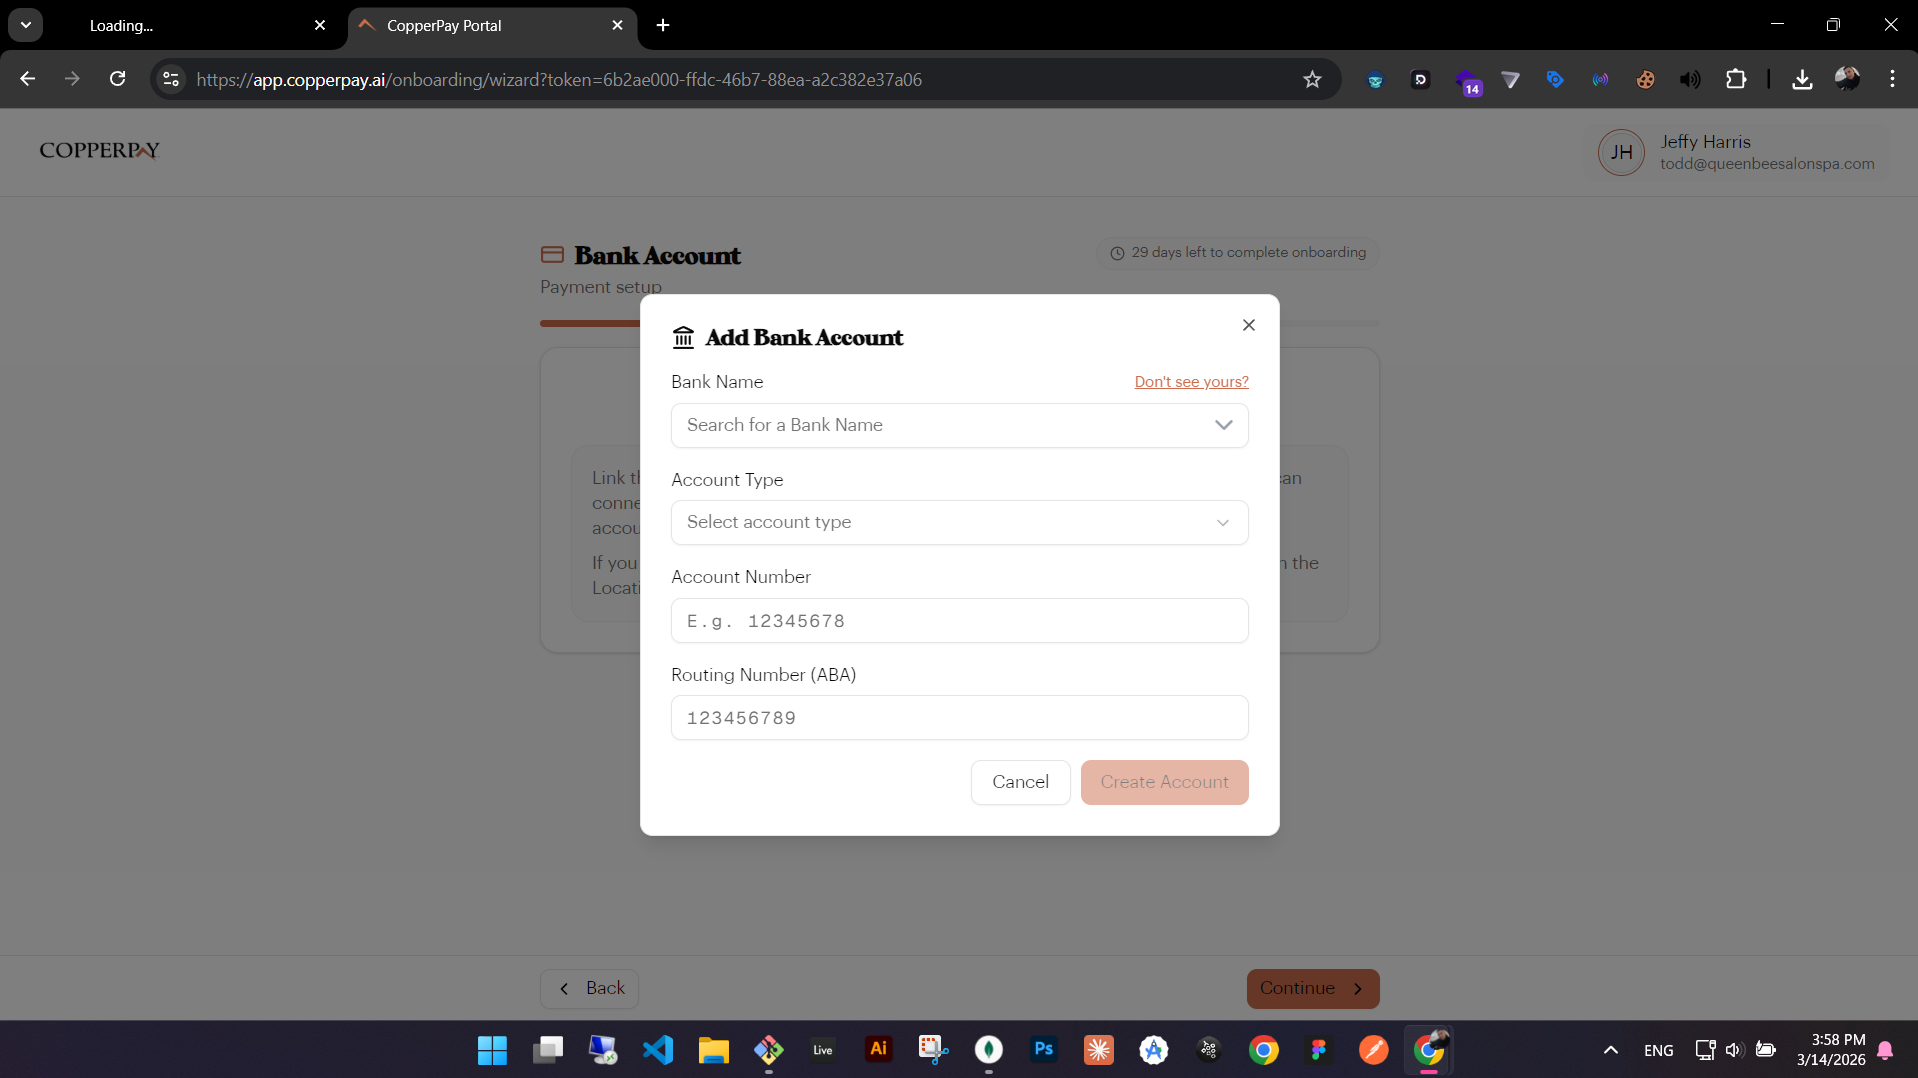
Click Continue.
Register Your Locations
Add all business locations covered by your policy.
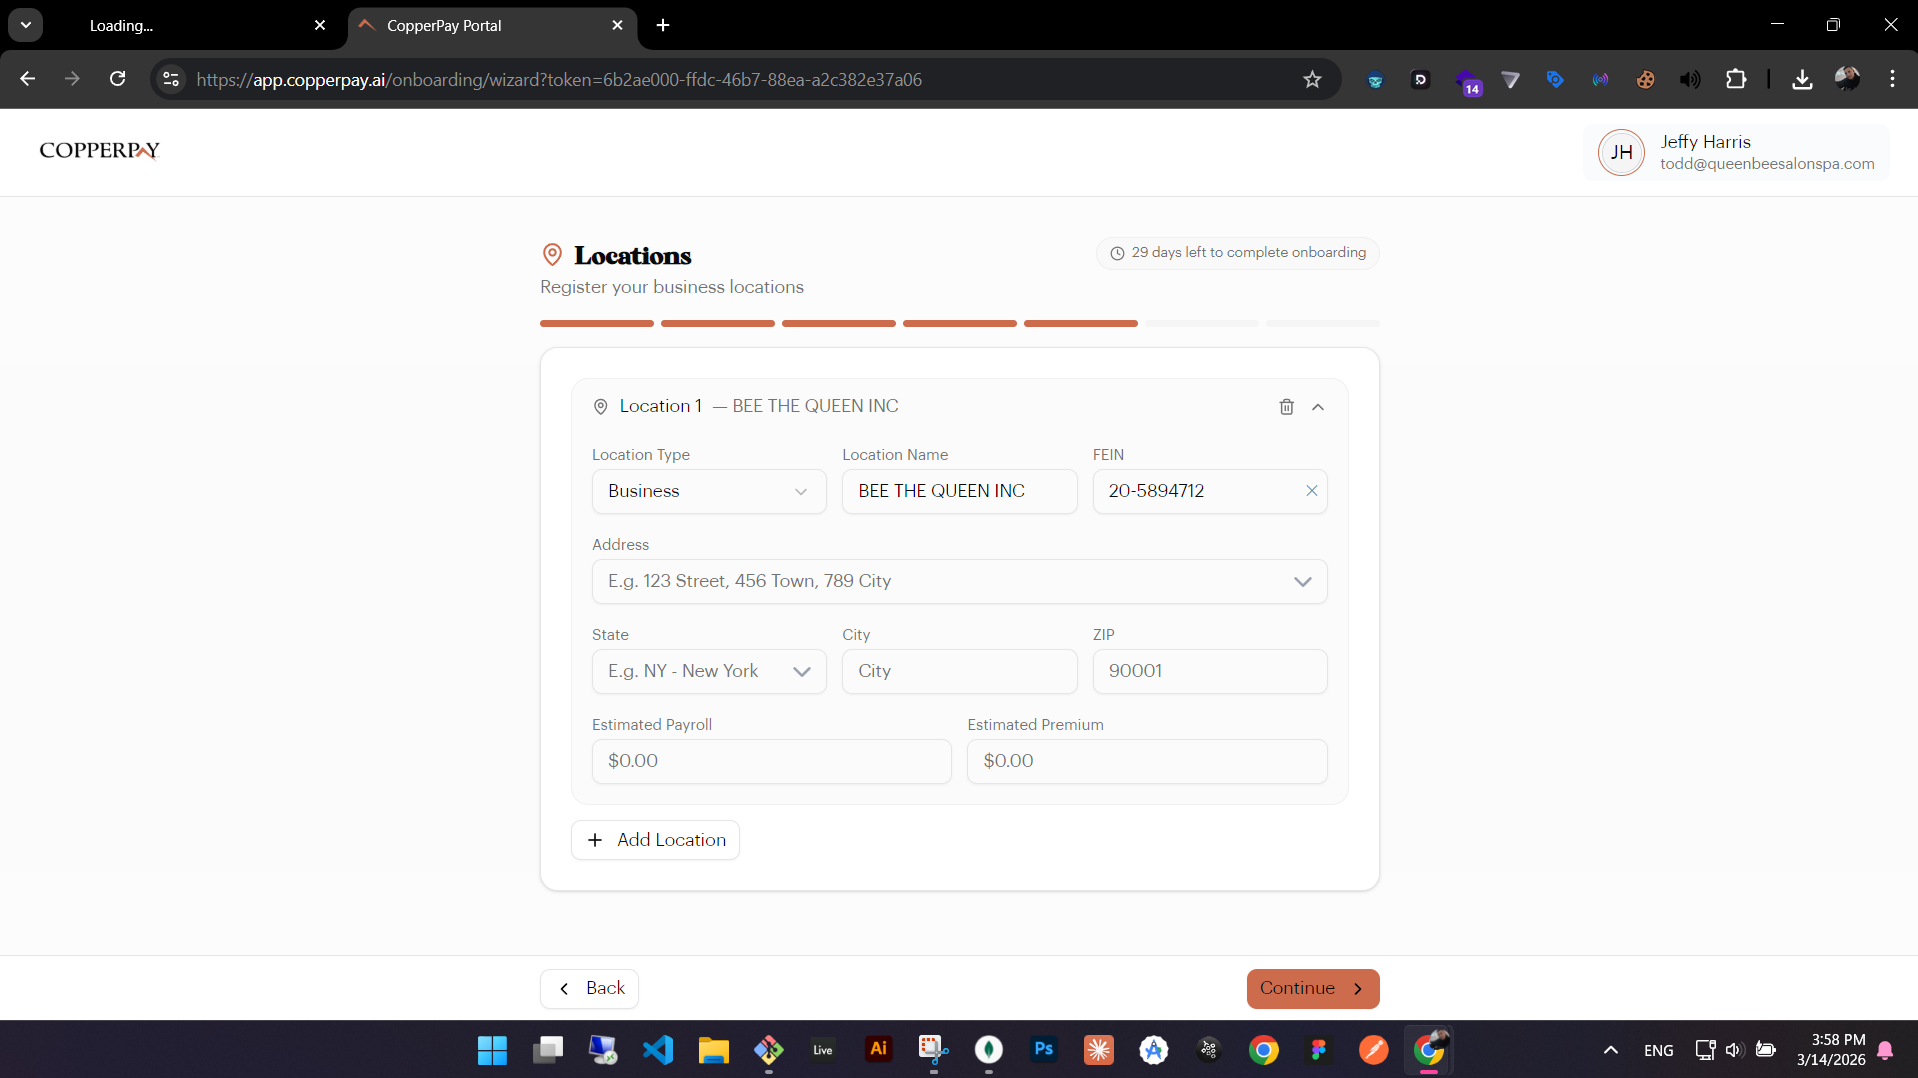
For each location, enter:
- Location Type (Business, Branch, etc.) and Location Name
- FEIN — your federal tax ID for this location
- Address — with Google Places autocomplete
- State, City, ZIP
- Estimated Payroll and Estimated Premium
Your first location is pre-filled from your company details. Click "+ Add Location" to add more. Click Continue when done.
Accept Agreements
Review and accept the required legal agreements.
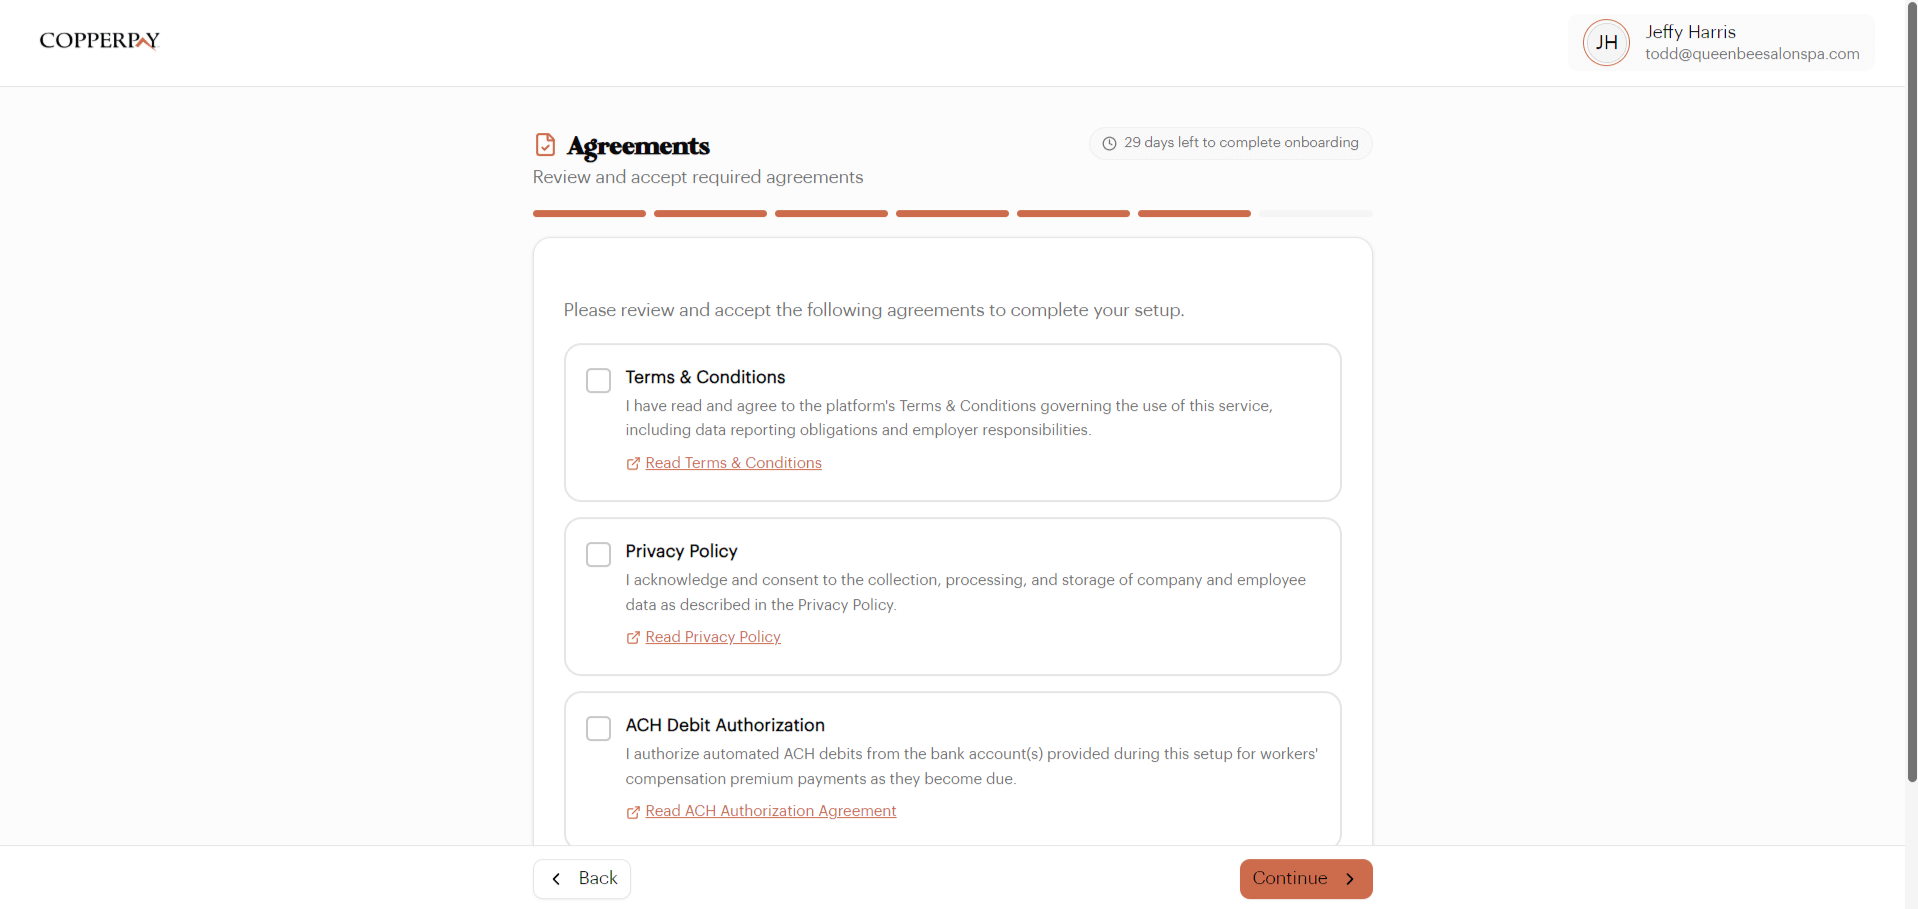
You need to accept three agreements:
- Terms & Conditions — platform terms and data reporting obligations
- Privacy Policy — how your data is collected and used
- ACH Debit Authorization — authorizes automated premium debits from your bank
Click each link to read the full document, then check all three boxes. Click Continue.
Review & Finish
Check everything one last time and complete your setup.
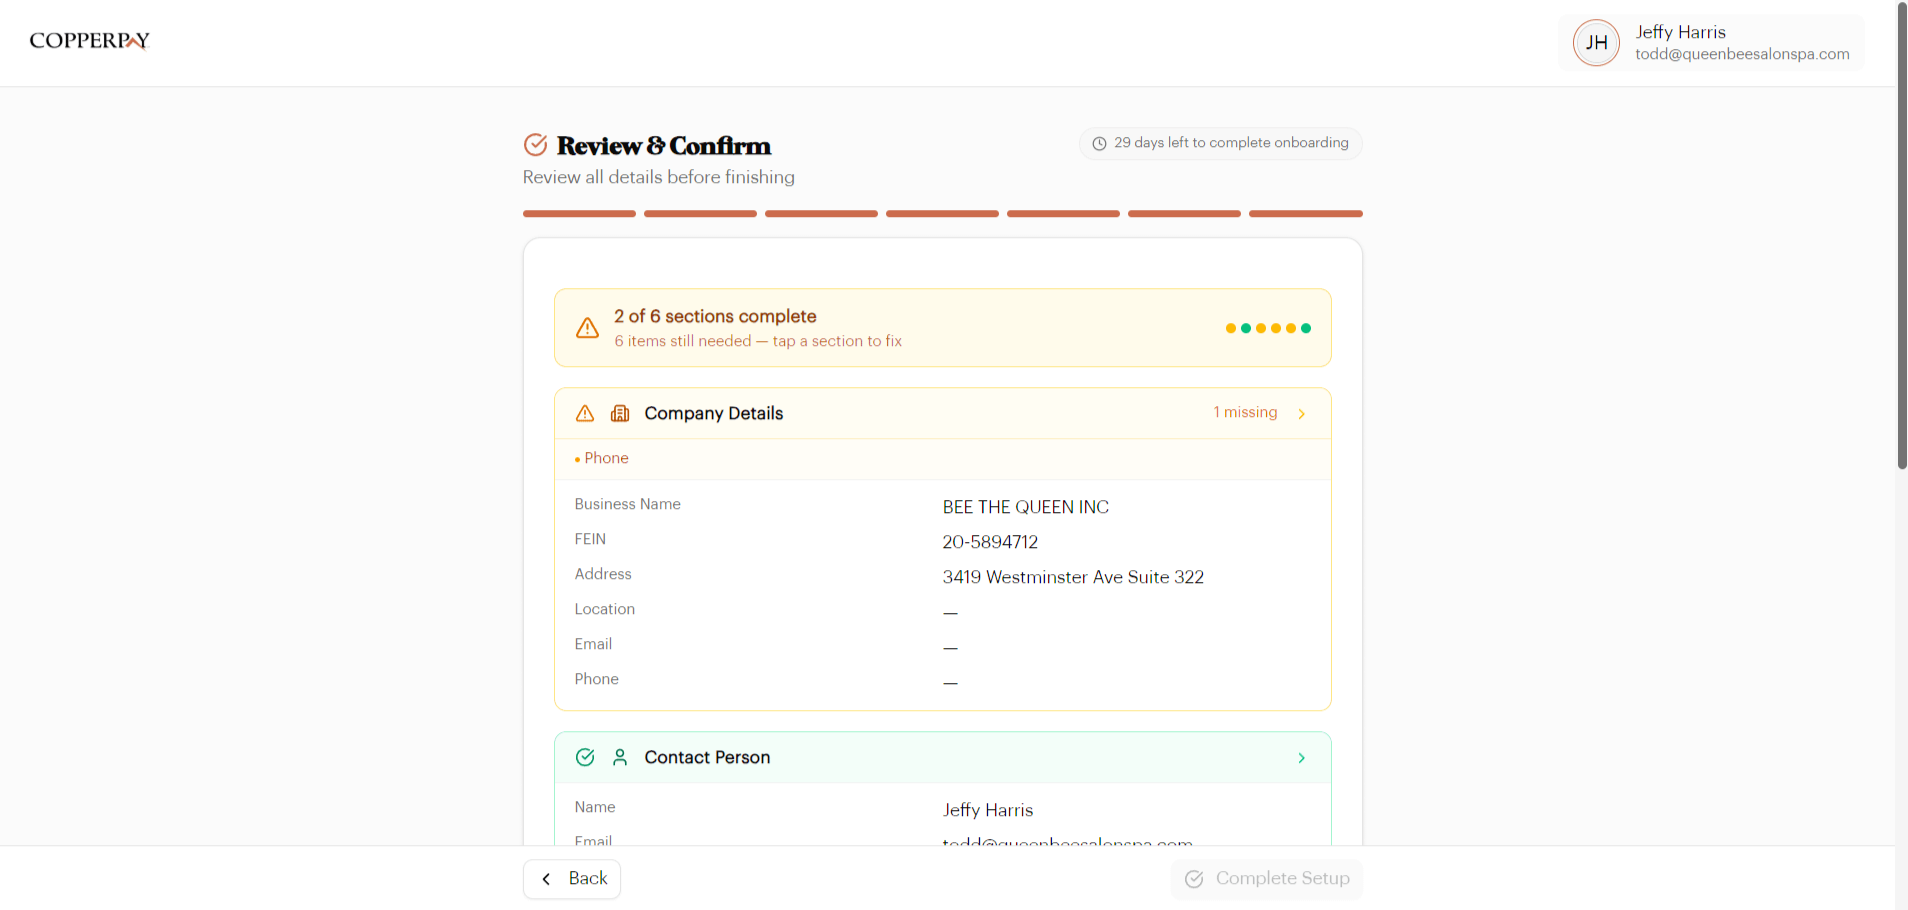
The review page summarizes everything you entered. Each section has a status indicator:
- Green check — this section is complete
- Yellow warning — some optional info is missing (e.g., phone number)
Click any section to go back and fix it. The "Complete Setup" button activates when all required sections are filled.